
Candle holders can transform any space, adding warmth and character to your apartment, whether you’re a creative renter, a student, or part of a bustling family. Constructing DIY candle holders not only enhances your decor but serves as a delightful and easy project that personalizes your rental home. The beauty of these projects lies in their affordability and adaptability; with a few supplies and a bit of inspiration, you can create stunning candle holders that reflect your style while adhering to your home’s aesthetic. This guide will walk you through two engaging DIY projects—perfect for showcasing your creativity and making your apartment truly feel like home. Each project is designed to be simple, requiring minimal tools and materials, making it accessible for anyone, regardless of crafting experience. Let’s dive into the delightful world of crafting your own candle holders that are not just functional but also serve as charming decor pieces!
Whimsical Mason Jar Holders
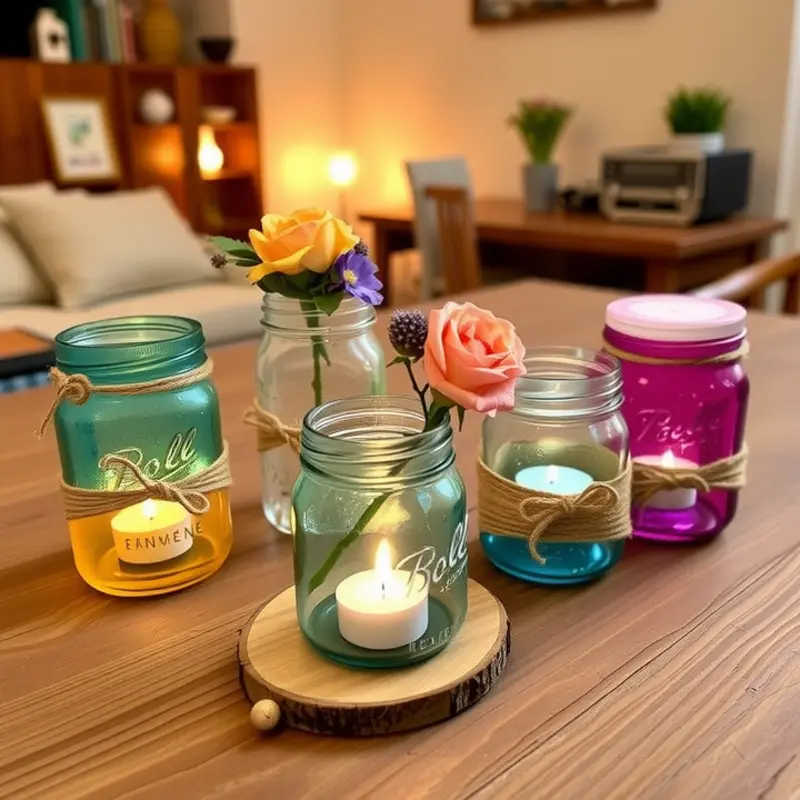
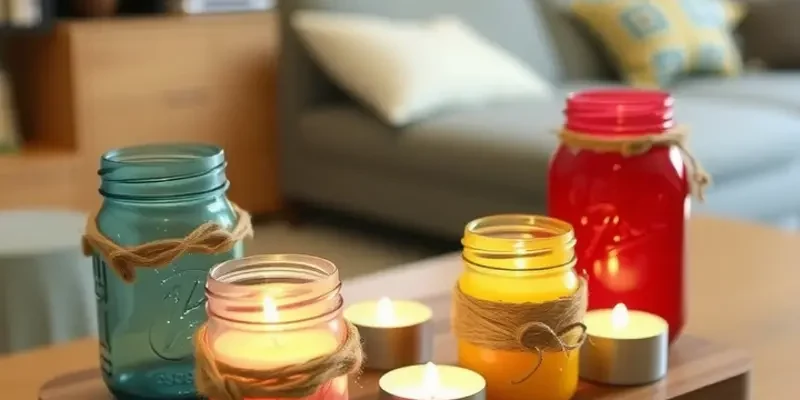
Transforming mason jars into candle holders opens up a world of decorative possibilities. Whether you’re aiming for rustic charm or modern elegance, mason jars can be your canvas. This simple DIY project allows you to customize your candle holders to suit any aesthetic, making it an ideal choice for enhancing your apartment’s ambiance.
Begin by gathering your materials. You’ll need a selection of mason jars, acrylic paint, brushes, decorative elements such as lace or twine, glue, and, of course, candles. Choose jars in varying sizes for a dynamic look. Opt for colors and decorations that complement your apartment’s decor theme.
Start with a clean slate. Ensure your mason jars are free of labels and residue. Wash and dry them thoroughly. If you prefer a softer, diffused glow, consider frosting the glass. This can be achieved with spray-on glass frosting, giving your holders a lovely, muted effect when lit.
Next, unleash your creativity with paint. Acrylic paint offers a versatile option, available in numerous shades. Try painting the jars in ombre effects by blending colors gradually. Alternatively, use a single color for a uniform appearance. Ensure the paint is applied evenly, and allow ample time for it to dry.
Once dry, it’s time to personalize your jars further. Adding lace or burlap around the jar’s necks adds a touch of elegance. Secure these with a small dot of glue. For a rustic vibe, tie a few rounds of twine around the neck, finishing with a bow. You might also consider embellishing with buttons or beads for additional texture.
After decorating, place your candles inside the jars. Opt for tealights or votive candles to fit comfortably. Mason jars can handle the heat, but always use caution. Ensure the jars are placed in a safe, stable place away from flammable materials. Here are more great DIY projects to embrace your creative side.
Finally, explore arrangement options. Group the jars in clusters for a cohesive centerpiece on your coffee table or disperse them through your living room to create pockets of light. Consider height variation by placing some jars on stacks of books.
This project not only brightens your space but also allows you to infuse your personality into your home decor. Made with love and creativity, these whimsical mason jar candle holders will serve as a testament to your artistic flair, perfect for any apartment setting.
Chic Wooden Block Holders
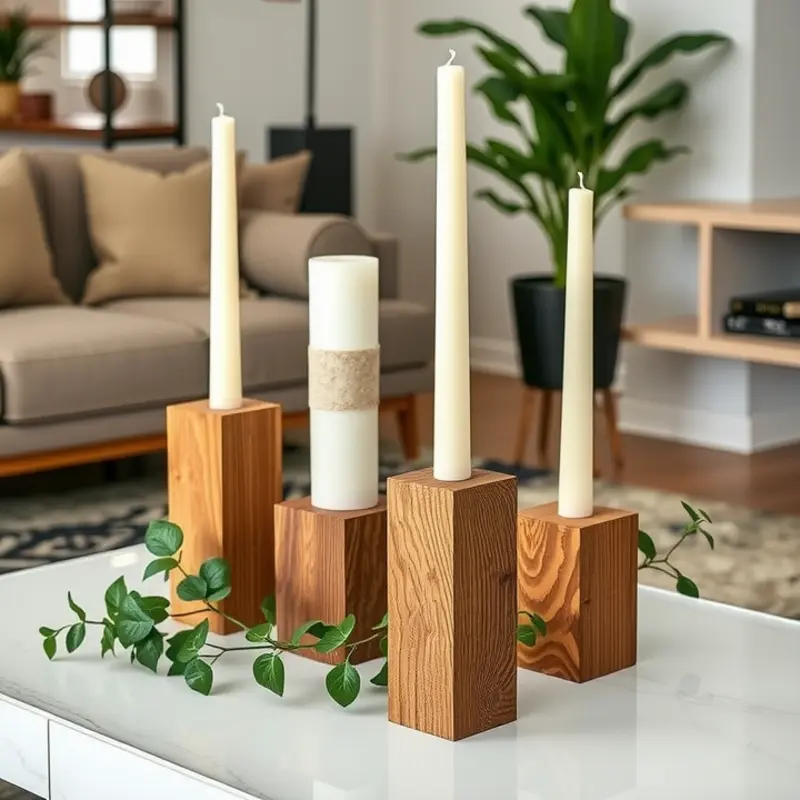
Crafting your own chic wooden block candle holders is a rewarding way to add a touch of nature and sophistication to your apartment. These holders are perfect for creating a cozy ambiance and can be easily customized to suit various design preferences, from sleek minimalism to vibrant bohemian styles. Here’s how you can make your own chic wooden block candle holders.
Materials Required:
- Wooden blocks: Opt for blocks that are approximately 4×4 inches or larger, depending on your desired size.
- Drill with a hole saw attachment: This is essential to carve out space for the candle.
- Sandpaper: Use to smooth any rough edges.
- Wood stain or paint: Choose a color that complements your décor.
- Clear polyurethane: For sealing the wood.
- Tea light or taper candles: Ensure your holes are suitable for the candle type selected.
Step-by-Step Guide:
-
Select Your Wooden Blocks: Start by choosing the right size and type of wood. Soft woods like pine are easy to work with, but hardwoods like oak provide a more polished finish. The choice depends on your personal aesthetic and the tools available.
-
Prepare the Blocks: Use sandpaper to smooth out each block. Pay attention to any rough or splintered edges. A fine grit paper works well for the final touch.
-
Create the Candle Insert: Attach a hole saw to your drill. The size of the hole saw should correspond to the candles you plan to use. For tea lights, a diameter of 1.5 inches is typically sufficient. Carefully drill into the top center of each block to create a hole deep enough to securely hold a candle without compromising the block’s structural integrity.
-
Customize Your Blocks: Now it’s time for personalization. Apply a wood stain or paint to suit your apartment’s color scheme. For a rustic look, you might leave the wood bare, highlighting its natural grain. Be sure to allow any stain or paint to dry fully between coats.
-
Seal the Wood: After your design dries, apply a coat of clear polyurethane. This protects your candle holder from wax drips and helps maintain its color over time.
-
Add the Finishing Touches: Once the polyurethane is completely dry, insert your candles. Arrange your new holders on tables or shelves to add warmth to your room.
These DIY wooden block candle holders are not only budget-friendly but also make excellent customized gifts for loved ones. For other creative décor ideas that suit apartment living, see DIY Apartment-Friendly Coffee Table Decor.
Crafting your own candle holders not only enhances the aesthetics of your living space but also offers a personal touch that store-bought items rarely provide. Enjoy the process, and revel in the cozy atmosphere they create in your home.
Final words
Creating your own candle holders is a fun and fulfilling way to add personalized flair to your rental home. With simple materials and a touch of creativity, you can make both whimsical mason jar holders and chic wooden block holders that elevate your decor while staying budget-friendly. These DIY projects are not just easy to execute but also provide a sense of accomplishment and joy as you light up your space. Remember, each holder you create is a reflection of your unique style and personality, transforming your apartment into a cozy sanctuary. Dive into these projects and let your creativity shine in the glow of your beautiful candle holders!


