
Time is precious, and what better way to cherish it than with a stylish clock that reflects your personality? For renters—including creative individuals, young professionals, students, and families—finding ways to personalize space can be a challenge. The good news is that DIY clocks offer an affordable and customizable solution that can enhance the aesthetic of your rental home. From vintage looks to modern designs, there’s a clock idea for everyone. Create conversation pieces that function beautifully while showcasing your creativity. With just a few materials and a little bit of time, you can craft wall clocks that fit seamlessly into your apartment style. Let’s embark on a journey of creativity, where practical home decor meets your unique flair.
Upcycled Wooden Clock: Rustic Charm
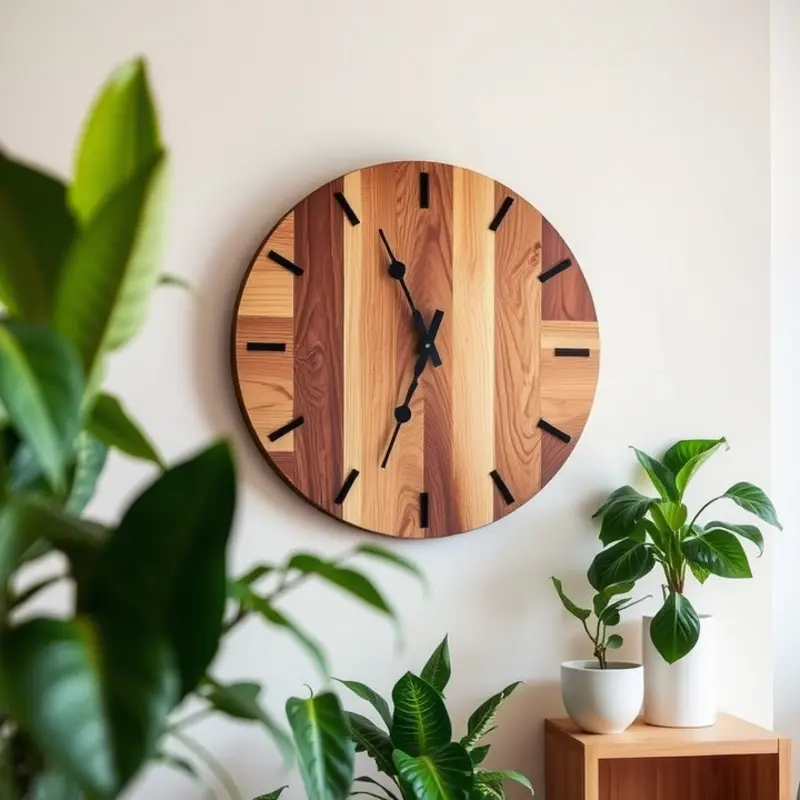
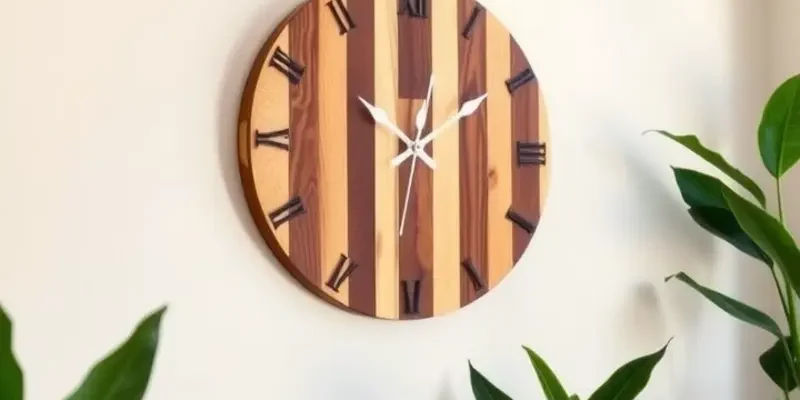
Transforming leftover wood into a striking wall clock not only breathes life into unused materials but also infuses your space with a cozy, rustic aesthetic. This DIY project is a perfect blend of creativity and sustainability, offering a custom touch to your rental apartment without breaking the bank.
Gather Materials: Your Crafting Essentials
To embark on this creative journey, first gather your materials. You’ll need reclaimed wooden pieces, a clock mechanism, a drill, and paint or stain to enhance the wood’s character. The beauty of this project lies in its flexibility; you can adapt it to the materials you have at hand.
Shape and Size: Crafting the Perfect Canvas
Once your materials are ready, it’s time to cut the wood to your preferred shape and size. You might choose a classic circular design or explore geometric shapes like rectangles or hexagons for a more modern twist. Keep in mind the available space on your wall — the clock should complement, not overcrowd, your existing decor.
Staining or Painting: Adding a Personal Touch
Staining or painting the wood is where your creativity truly takes flight. A dark walnut stain can amplify the rustic charm, lending a vintage aura. Alternatively, a splash of bright paint can create a vibrant focal point that energizes your room. Take your time with this step, remembering that your choice reflects your personal style.
Drilling and Assembling: From Pieces to Timepiece
With your canvas ready, drill a hole at the wood’s center to accommodate the clock mechanism. Precision here is crucial to ensure the clock’s functionality. Following the drill, assemble the mechanism according to its instructions and carefully attach the clock hands. This delicate step transforms wood into a working timepiece that delights with every tick.
Displaying Your Creation: The Final Flourish
Hang your clock in an area that draws attention; perhaps above your couch or beside an art piece, ensuring it’s a conversation starter. The rustic appeal will harmonize beautifully with other natural elements in your apartment, like plants or wicker baskets. You might find inspiration for complementary furnishings in other DIY projects, such as making apartment-friendly headboards found here.
Finally, stand back to admire your handiwork. This upcycled wooden clock isn’t just a decorative accessory; it’s a personalized piece that tells a story of resourcefulness and artistic exploration. Relish the added warmth and uniqueness it brings to your living space, a testament to your creativity and commitment to sustainable living.
Colorful Geometric Clock: Modern Art Statement
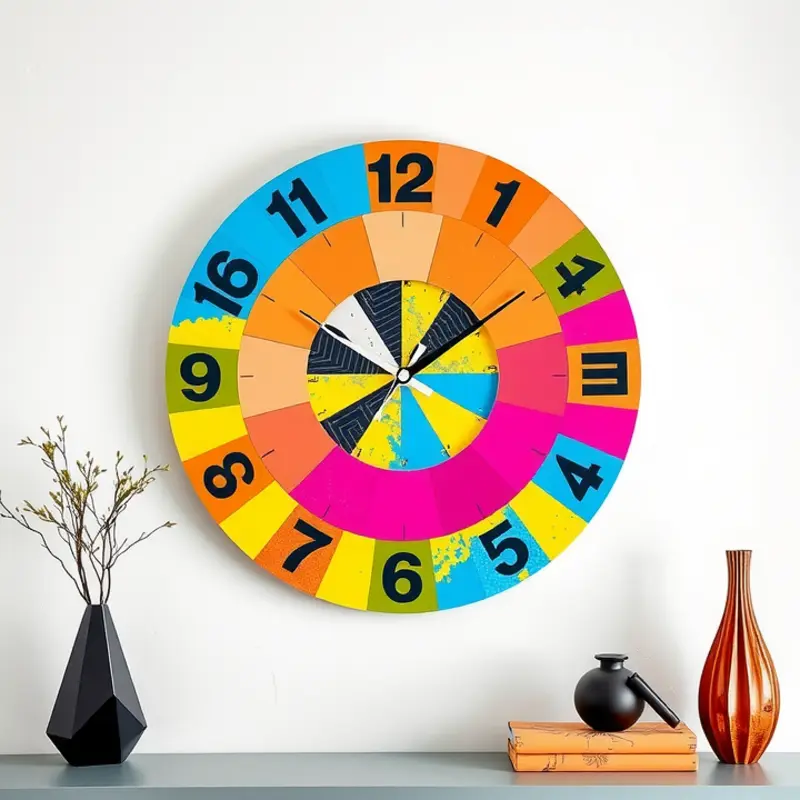
Transform your living space with a colorful geometric clock that doubles as a piece of art. It’s an easy way to infuse your apartment with vibrant energy and creativity. Additionally, creating this piece allows you to express your unique style without breaking the bank.
Materials You’ll Need:
- Round base (MDF or wood, approximately 12 inches in diameter)
- Assorted acrylic paints or adhesive vinyl sheets
- Clock mechanism kit
- Paintbrushes or sponge brushes
- Drill
- Hardware for wall mounting
Step-by-Step Guide:
-
Select the Base:
Choose a round base of MDF or wood. MDF is a great option for a smooth finish, while wood adds a natural element. Ensure the surface is clean and dry before you start working on it. -
Design the Pattern:
Sketch out your geometric pattern on paper first. Consider using triangles, squares, and circles to create a harmonious design. Bold colors can create a striking visual impact, so pick a palette that reflects your taste. -
Paint the Base:
Lay down your base color first, covering the entire surface. Use a sponge brush for an even coat. Once dry, apply painter’s tape to outline your geometric shapes. Proceed to paint within the taped areas with different colors to form your design. -
Alternative with Vinyl:
If you’re using adhesive vinyl, cut out your geometric shapes and apply them to the base. This method is quicker and reduces drying time, allowing for crisp edges and vibrant colors without paintbrush skills. -
Drill for the Mechanism:
Once the paint or vinyl has fully dried, carefully drill a hole in the center of your base. This hole will accommodate the clock mechanism. Follow safety precautions and use a drill bit that matches the size needed. -
Assemble the Clock:
Insert the clock mechanism through the drilled hole, attaching the clock face and securing it with the provided hardware. Choose hands that stand out against your background colors for easy readability. -
Mount on the Wall:
Choose a focal point in your living space to mount your clock. Use appropriate wall-mounting hardware, ensuring it is securely in place. Your colorful geometric clock will now bring modern art flair to your home.
Creating a DIY clock not only personalizes your living area but also adds functionality. You could pair your new creative piece with other DIY projects, like these renter-friendly headboards to further enhance your space with style and comfort. Let this artistic project inspire more creative endeavors in your apartment home.
Final words
Creating DIY clocks is a fun and rewarding way to personalize your rental home without breaking the bank. Not only do these clocks serve a practical purpose, but they also become part of your home’s story—showcasing your taste and creativity. From rustic wooden designs to vibrant geometric styles, the possibilities are endless. Remember, it’s not just about telling time; it’s about expressing who you are in your living space. Get inspired, gather your materials, and let your creativity flourish with these DIY clock projects.


