
Living in a rental doesn’t mean sacrificing style or functionality. Apartment-friendly DIY coat racks offer the perfect opportunity for renters, students, families, and young professionals to express their creativity and enhance their living space. These projects are not just practical solutions for storage but also allow you to add a personal touch to your home. With a few tools and materials, you can build a unique coat rack that fits your needs and style while keeping your apartment rental-friendly. In this guide, we’ll explore inspiring ideas and provide clear, step-by-step instructions to create coat racks that will impress your guests and make your home feel more inviting. Let’s dive into these creative solutions that help you organize while showcasing your personality!
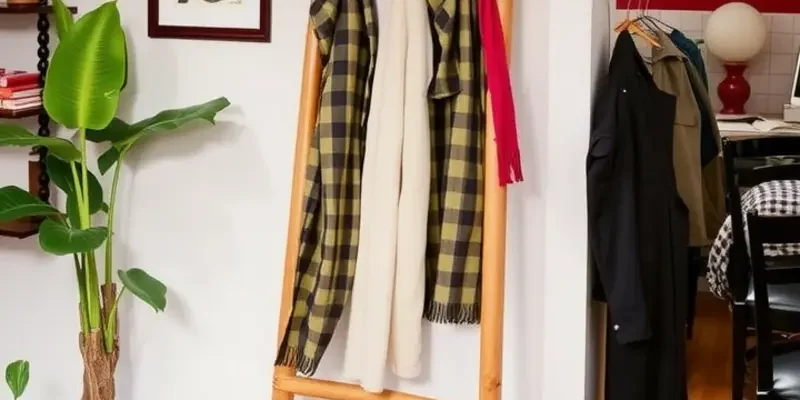
Decorative Ladder Coat Rack
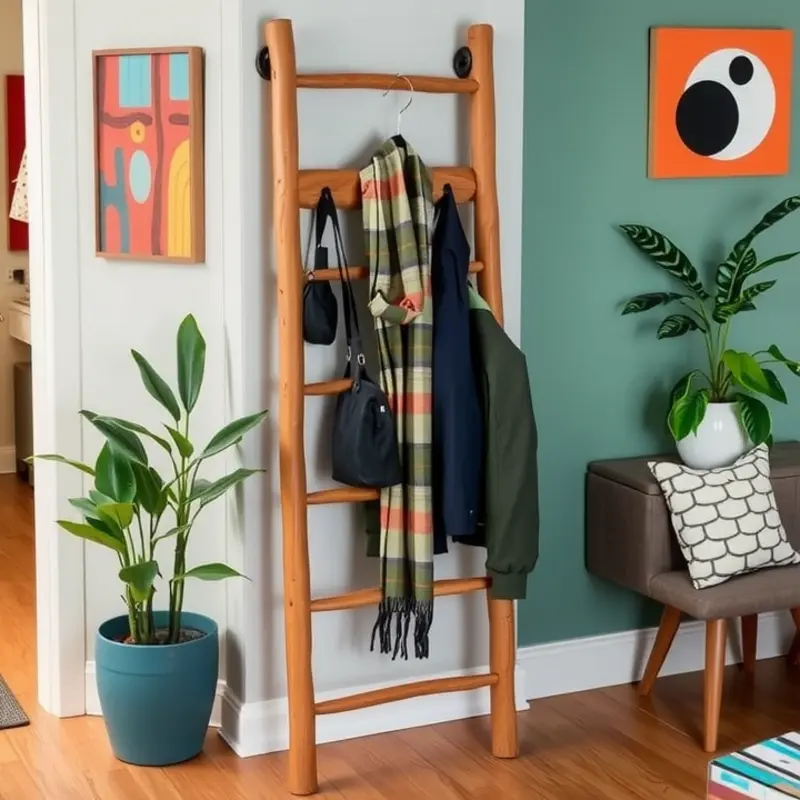
Elevate your home’s aesthetic and practicality with a decorative ladder coat rack that seamlessly marries form and function. This DIY project highlights simplicity and creativity, showcasing a unique storage solution that renters will find ideal due to its non-permanent nature.
Start by sourcing a small, sturdy wooden ladder, an element that stands as the backbone of this creative endeavor. An upcycled ladder is perfect — sustainability meets style. For those lacking access to an old ladder, craft stores often sell simple balsa wood options designed for paint and decoration.
Materials Needed:
- Wooden ladder or similar framework
- Wooden dowels (approximately 1-inch diameter)
- Sandpaper
- Wood glue or screws (optional for more support)
- Paint or wood stain
- Paint brushes or rollers
Begin by sanding the ladder frame to remove any rough edges and ensure a smooth surface, especially if it comes from an older repurposed option. Sanding also allows the paint or stain to adhere better, enhancing durability and finish.
Next, consider the aesthetic. Whether you prefer a rustic charm or modern minimalist design, your choice of paint or stain will set the tone. For a rustic look, opt for a warm wood stain, enhancing the natural grains. Conversely, bold paint colors can turn the ladder into a statement piece. Apply your chosen finish in a well-ventilated area, allowing ample drying time between coats.
While your ladder dries, prepare the dowels which will serve as the hooks for your coats. Saw the dowels into equal lengths, approximately 6 inches each, ensuring consistency. Sand the edges smoothly to prevent any snagging on fabrics. Once sanded, paint or stain these to match or complement your ladder’s color.
Now to assemble your masterpiece. Determine equidistant spots along the ladder where the dowels will be placed. Mark each position lightly with a pencil to guide the drilling process. Drill holes slightly smaller than the dowel diameter to ensure a snug fit. Insert the dowels into the pre-drilled holes, securing them with wood glue or small screws for additional stability.
For a final touch, consider adding small decorative elements that reflect your personality. Hooks, small planters or hanging art pieces can add depth and individuality. Attach these with minimal fixtures, preserving the integrity of the ladder and respecting the temporary nature of rental spaces.
This artistic and functional piece not only organizes your entryway but also adds a personalized flair to your décor. Easy to disassemble, it’s the perfect solution for renters looking to impose personality on their given space without risking security deposit losses. For more renter-friendly DIY projects, explore simple storage ideas to inspire your creative journey in apartment living.
Wall-Mounted Pegboard Coat Rack
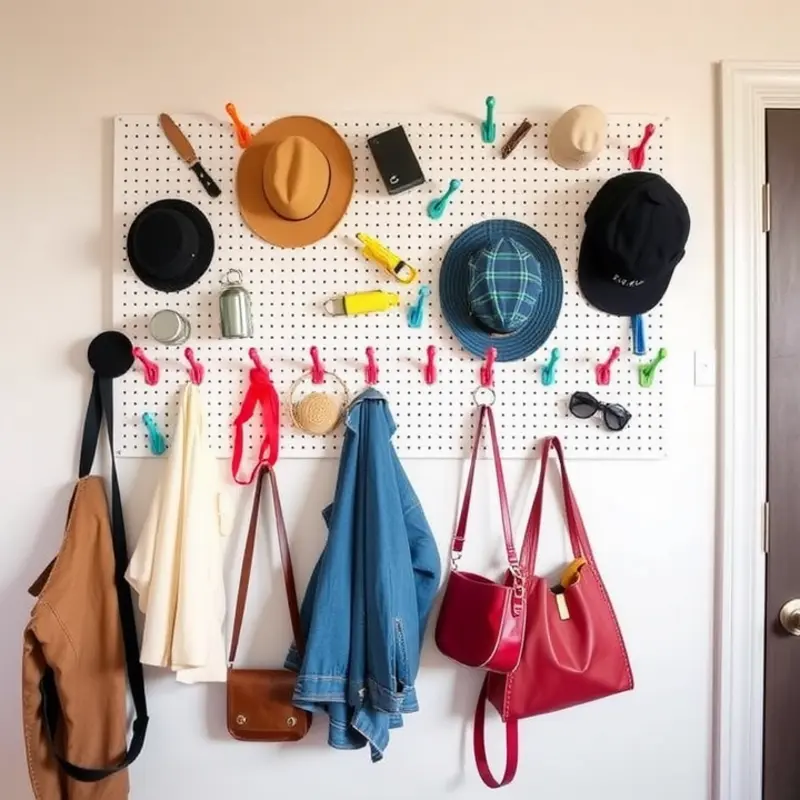
A wall-mounted pegboard coat rack can redefine your apartment’s entryway, offering functionality coupled with a personal flair. Its flexible design ensures you make the most out of vertical space, especially valuable in compact areas.
Start by selecting a pegboard that complements your wall color and aesthetic preference. Pegboards come in various materials and sizes, so choose one that fits seamlessly into your layout. Since alterations might not be allowed in rentals, adhere to the lease agreements by using removable strips or hooks for installation. These will keep your walls pristine when it’s time to move out.
Next, paint the pegboard to reflect your style. Opt for a bold hue for a focal point or harmonize it with your existing decor by selecting a neutral palette. A coat of paint adds vibrancy and protects the surface from wear. Let your creativity flow by using stencils to add patterns or borders for extra charm.
Select a variety of peg hooks to accommodate different items. Multi-sized hooks hold coats, scarves, and bags effortlessly. Consider adding shelf brackets for a horizontal platform to set keys or plants. Simple hooks are perfect for coats, while longer pegs can organize umbrellas or hats. The beauty of a pegboard lies in its adaptability. Rearrange the hooks to suit your needs without the hassle.
Incorporating small storage solutions enhances functionality. Hang baskets to store gloves or mail, creating a mini organizational station. Choose woven baskets for a rustic touch or sleek metallic ones for a modern vibe. Adding a small mirror hung at eye level can also serve as a last-minute check station while simultaneously reflecting light to make your space feel open.
Enhance the charm by integrating decorative items. Drape a string of fairy lights or hang framed photos to add a personal touch. The key is to blend practicality with elements of style, transforming your pegboard into more than just a utility but a statement piece.
For those interested in sustainability, consider sourcing second-hand materials. Upcycling supports eco-friendly practices and offers uniqueness to your project. Visit local thrift stores for pegboards and hardware, ensuring your version is both budget-friendly and distinct.
The flexibility of this installation ensures it can evolve with you. As seasons and styles change, rearrange or repaint without difficulty, maintaining an updated look year-round. Wall-mounted pegboards adapt easily, whether you’re shifting apartments or simply in need of a fresh decor idea.
If you’re interested in more apartment-friendly storage ideas, check out this guide on DIY renter-safe organizers. Embrace the art of DIY to effortlessly configure your living space while honoring any rental restrictions.
Final words
Crafting your own DIY coat racks isn’t just about utility; it’s about making your living space feel like home. Both the decorative ladder coat rack and wall-mounted pegboard rack offer unique styles that reflect your personality, while also providing practical solutions for organization. These projects are simple enough for beginners and allow you to customize designs according to your taste and space needs. Embrace your creativity, and remember that even small changes can make a significant impact on the ambiance of your rental home. Happy crafting!


