Renting a space doesn’t mean you need to sacrifice style or functionality. With limited storage solutions, a DIY storage ottoman can be the perfect solution to add both practicality and charm to your apartment. Ideal for creative renters, young professionals, students, and families, this project allows you to express your personality while maximizing your living space. Not only does a storage ottoman serve as a chic seating option, but it also provides hidden storage for blankets, books, toys, or anything else cluttering your space. With affordable materials and simple steps, you can craft a unique piece that reflects your aesthetics. Let’s dive into this fun project that anyone can tackle and explore how it’s done with easy instructions and inspiring designs. Ready to roll up your sleeves and create a fabulous storage solution? Let’s get started!
Gathering Your Materials: Essentials for a DIY Storage Ottoman

Creating your own storage ottoman offers both style and practicality, especially in rental spaces where maximizing storage in an attractive way is crucial. Before embarking on this DIY journey, ensuring you have all the necessary materials and tools is essential for a seamless crafting experience.
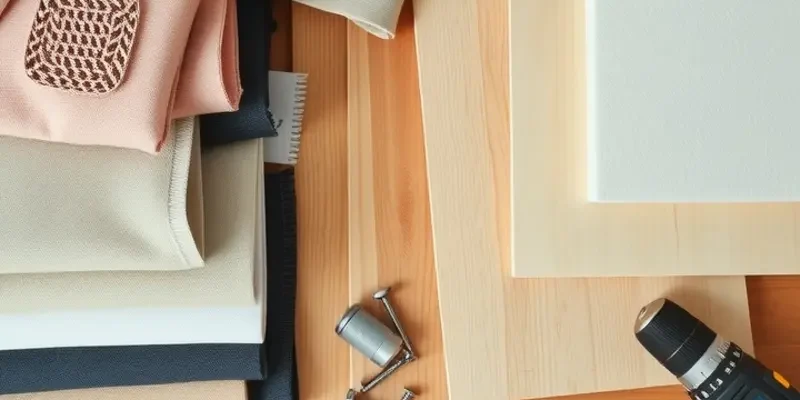
Start by selecting the fabric, as this will largely define the aesthetic of your ottoman. Consider materials that not only match the existing decor but are also durable and easy to clean. Velvet adds a touch of luxury, while canvas or denim offers a more casual, durable feel. For those seeking eco-friendly options, recycled cotton or hemp can be stylish and sustainable choices.
The base of your ottoman is equally important. Look for a sturdy yet lightweight frame that can withstand regular use. Plywood is a popular choice due to its strength and ease of handling. Ensure it’s cut to your desired dimensions and the edges are smoothed out to prevent splinters.
When it comes to padding, high-density foam is your best bet for comfort and long-lasting resilience. Consider a thickness of at least two inches. This ensures a comfortable seating option as well as a protective layer for items stored inside the ottoman.
You’ll also need a reliable adhesive for securing fabric to the frame. Spray adhesive is a good option, providing even distribution and quick drying times. A heavy-duty staple gun will help affix the fabric securely, especially around corners and edges. Additionally, a sewing kit might come in handy for making any necessary fabric adjustments or adding decorative trims.
Don’t forget the tools required for assembly. A power drill with screwdriver attachments, a measuring tape, and a saw (if custom cutting is required) are essential. Keep these tools organized to streamline the building process.
Consider visiting a local fabric store to feel the textiles firsthand and compare texture, elasticity, and color. Pay attention to the care instructions on the labels to determine the upkeep required for each fabric type.
For further inspiration and tips on maximizing organization in small spaces, you might find it useful to explore resources like apartment organization baskets, which offer creative solutions for managing clutter effectively.
By gathering these materials and tools before starting your project, you pave the way for a successful and enjoyable DIY experience. Once you have all your essentials assembled, you can look forward to crafting a storage ottoman that is both functional and visually pleasing, perfectly suited for your rental space.
Crafting Your DIY Storage Ottoman: Step-by-Step Instructions

Creating your own storage ottoman not only enhances the style of your living space but also adds much-needed storage without compromising on aesthetics. Whether you live in a cozy studio or a spacious apartment, a DIY storage ottoman can be customized to fit any corner.
Materials Needed:
- Wooden board (plywood or MDF) for the base
- Upholstery foam
- Fabric of your choice
- Hinges
- Staple gun
- Screws
- Drill
- Measuring tape
- Saw
Step 1: Cutting the Base
Start by deciding the dimensions of your ottoman. A square shape can efficiently provide ample storage. Once you’ve determined the size, use a saw to cut the wooden board to these dimensions. The base will form the bottom of your ottoman, ensuring it is sturdy enough to hold weight while storing items inside.
Step 2: Assembling the Frame
Cut four pieces of wood to form the sides of your ottoman, ensuring they are the same height. Attach these pieces around the base using screws, forming a box. A drill will make this process smoother, ensuring the sides are securely attached.
Step 3: Adding the Foam
Cut upholstery foam to match the dimensions of the top lid. The thickness of the foam will determine the cushioning of your seat, so choose accordingly. Attach the foam to the lid using spray adhesive or a staple gun. Ensure the foam is even and covers the entire surface.
Step 4: Upholstering the Ottoman
Lay out your fabric and place the foam-covered lid face down on it. Cut the fabric, leaving enough excess to wrap around and staple underneath. Carefully pull the fabric taut over the foam and secure it with your staple gun. This step may require some adjustments to avoid any wrinkles or uneven areas.
Step 5: Attaching the Hinges
Position the lid on top of the box frame. Secure it with hinges to the back side of the ottoman. This will allow the lid to open and close easily. Ensure the hinges are carefully aligned and properly screwed in, so the lid operates smoothly.
Step 6: Final Assembly
Once everything is upholstered and the lid is securely attached, ensure that all screws are tightened and the structure feels firm. Test the opening and closing mechanism several times to make sure the hinges and assembly are stable.
This straightforward project gives you both a stylish seating option and a practical storage solution. Once complete, you’ll have a beautiful ottoman that can double as a conversation piece or even complement your apartment organization strategies. Just imagine the possibilities—colorful fabrics can add a splash of vibrancy, while muted tones can offer a sophisticated touch. Whatever you choose, make your DIY storage ottoman uniquely yours, perfectly tailored to your space and style.
Final words
Creating a DIY storage ottoman is not only a rewarding project; it’s a fantastic way to inject some personality into your rented space while also addressing common storage woes. By choosing your fabrics, colors, and materials, you harness the power to transform a practical piece of furniture into an expression of your unique style. Whether you’re a creative renter, a busy professional, a student, or a family, this customizable solution promises to elevate your home and keep it organized. Enjoy the process, and revel in the completed project that reflects both function and flair! Happy crafting!


