
Renting an apartment comes with its own set of challenges, especially when it comes to creating a personalized space. Young professionals, students, families, and creative renters often feel limited by the constraints of their rental agreements. However, with a bit of creativity and some DIY skills, making a stylish, functional vanity that suits your needs is absolutely achievable. This guide will help you navigate the world of apartment-friendly vanity ideas that are not only easy to implement but also kind on your budget. From simple modifications to decorating hacks, the following chapters will inspire you to make your vanity an expression of your unique style while being considerate of your living situation. Let’s dive into these elegant yet practical solutions that enhance your space without compromising your lease.
Floating Shelves for a Minimalist Vanity
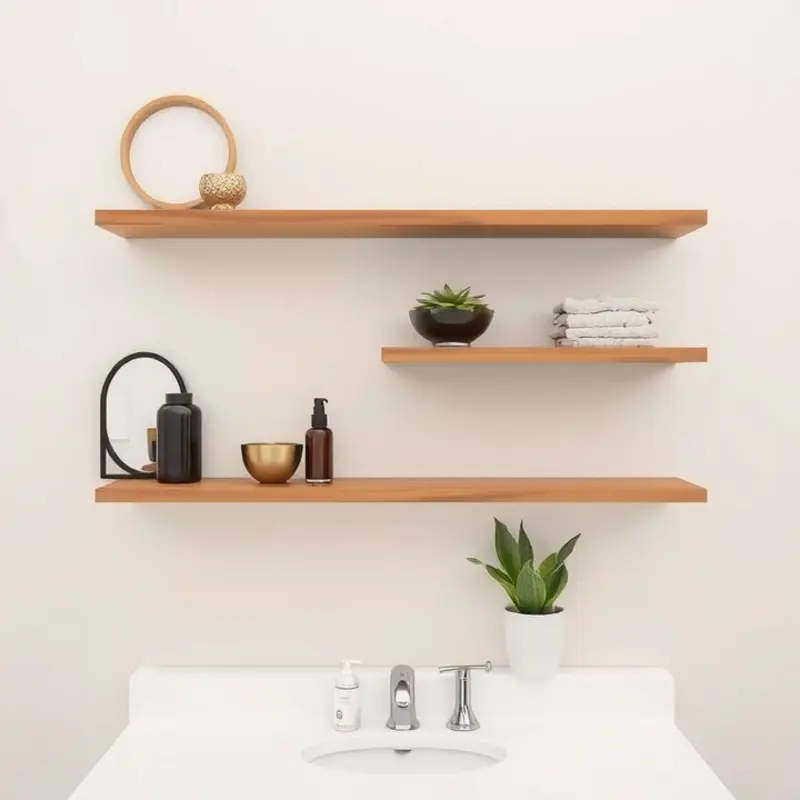
Creating a minimalist vanity using floating shelves is a brilliant way to maximize space without clutter. Floating shelves deliver a sleek appearance and can adapt to any interior style, making them highly versatile. To achieve this, you’ll need a few materials and tools to get started, as well as some styling tips to ensure your vanity is not only functional but also chic.
Materials Needed:
- Floating shelves: Choose the size and color that best fits your space.
- Wall anchors and screws: Opt for heavy-duty ones to ensure stability.
- A level: Essential for installing shelves evenly.
- A drill: For making holes in the wall.
- A stud finder: Helps locate wall studs for added shelf support.
Step-by-Step Instructions:
-
Choose the Right Location: Begin by identifying the most suitable spot for your floating shelves. Ideally, it should be at eye level when seated so you have easy access to your beauty essentials.
-
Use a Stud Finder: Before drilling, use a stud finder to locate studs in the wall. Shelves anchored into studs can support more weight, which is crucial for holding items like toiletries and mirrors.
-
Mark Your Points: Once you’ve determined where the studs are or if you must use wall anchors, use a pencil to mark the points where you’ll drill. Ensure these marks adhere to the measurements needed for your chosen shelves.
-
Drill Holes: With your drill, create holes at the marked points. If using anchors, gently tap them into the holes.
-
Mount the Shelves: Align your floating shelves with the drilled holes, insert screws into the anchors or studs, and steadily tighten them. Use your level throughout this process to ensure the shelves are straight.
Styling Tips:
- Keep it Simple: A minimalist vanity benefits from a less-is-more approach. Select a few elegant jars or containers to organize cosmetics and brushes.
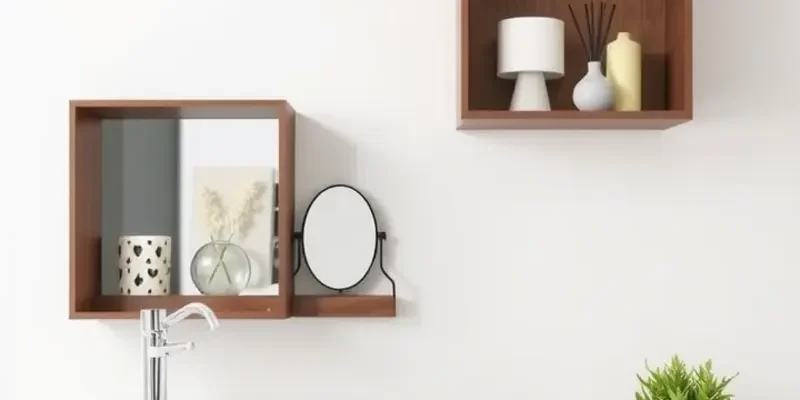
- Incorporate a Mirror: Add a frameless or thin-framed mirror above the shelves to enhance functionality without compromising the minimalist aesthetic.
- Introduce Greenery: Add a small, easy-to-maintain plant for a touch of color and life. Consider moving houseplants safely to maintain their health in new spaces.
- Accent Lighting: To ensure the space is welcoming and efficient, incorporate subtle lighting solutions. Small LED strips or battery-powered lights under the shelves can provide adequate lighting without wires.
By following these steps and tips, you can transform any small space into a sophisticated and stylish vanity area. The use of floating shelves optimizes your space utilization while preserving the clean aesthetics typical of minimalist designs. With the right materials and a touch of creativity, your vanity will become a personalized haven within your apartment.
Upcycled Dressers as Unique Vanities
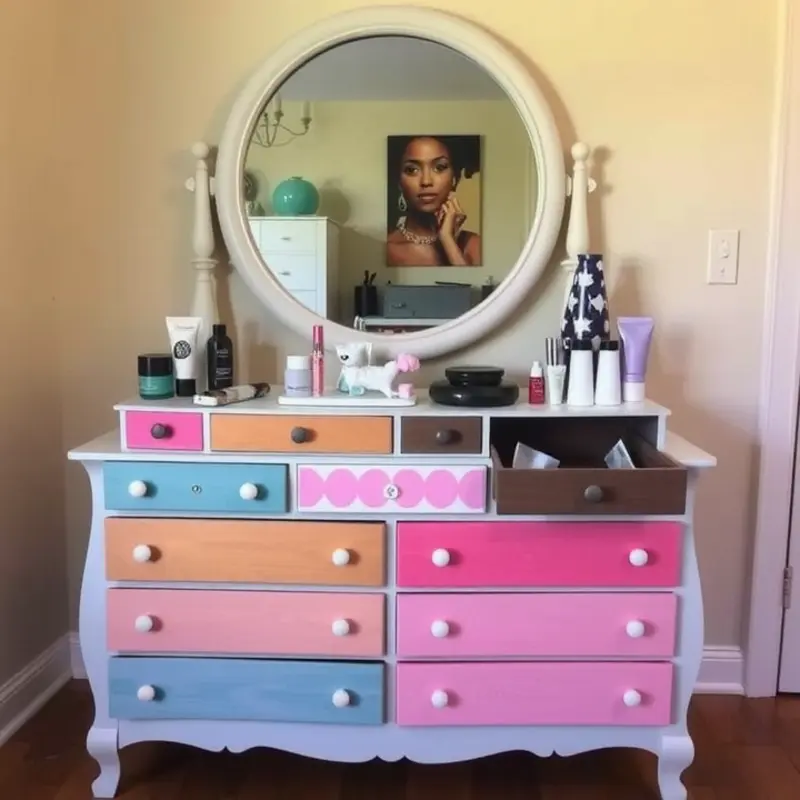
Revamping a vintage dresser into a chic vanity provides a personal touch to apartment living. This step-by-step guide will help you transform an old dresser into a functional and aesthetically pleasing piece.
Materials and Tools Required:
- Old dresser
- Sandpaper (medium and fine grit)
- Primer and paint
- Paintbrushes or rollers
- New drawer pulls or knobs
- Screwdriver
- Sealant finish
- Optional: Adhesive wallpaper or decorative paper
Step 1: Preparing the Dresser
Start with sanding the entire surface of the dresser using medium-grit sandpaper. This removes old paint or varnish and prepares the surface for priming. Finish with fine-grit sandpaper for a smoother texture. Wipe down the dresser with a damp cloth to remove dust particles.
Step 2: Priming and Painting
Apply a primer suitable for your chosen paint type. Primer ensures better paint adhesion and longevity. Once the primer is dry, begin painting the dresser with your chosen color. Use two coats for optimal coverage, allowing the paint to dry completely between layers. For an extra touch, consider using adhesive wallpaper or decorative paper on the sides or top of the dresser. Cut to size, apply carefully, and smooth out any air bubbles.
Step 3: Replacing Hardware
While paint dries, remove old drawer pulls or knobs. Choose hardware that complements your new color scheme, enhancing both function and style. Use a screwdriver to affix new pulls or knobs securely.
Step 4: Layout and Space Optimization
To fully utilize the dresser’s potential as a vanity, organize the drawers. Dedicate space for makeup, brushes, and other essentials. Use drawer organizers to keep everything tidy and accessible. Ensure heavier items are on the bottom to prevent tipping.
Step 5: Sealing and Finishing Touches
Apply a sealant finish to your painted dresser to protect against moisture and wear. This step is crucial, especially if your vanity is in a bathroom or humid environment.
For those exploring additional projects, consider DIY towel holders to complement your vanity and maintain cohesion in your decor. You can find an easy guide to creating renter-friendly towel holders here.
This project not only offers a unique vanity solution but also contributes to sustainable living by repurposing furniture. This creative undertaking turns functional furniture into a statement piece, adding character and utility to any apartment.
Final words
Creating a personalized vanity in a rental apartment doesn’t have to be overwhelming or expensive. By using these DIY solutions, you can create a space that reflects your taste and meets your needs without violating your lease agreement. Whether you opt for floating shelves to retain a minimalist look or breathe new life into an old dresser, the key is to embrace your creativity. Every project is an opportunity to make your living space uniquely yours. So gather your materials, envision your dream vanity, and let your imagination shine. Your rental home is just a few DIY projects away from being the personalized haven you deserve.


