
For young professionals, students, and families living in rental apartments, creating a cozy and personalized space can sometimes feel like a challenge. You may find yourself constrained by rental regulations, limited space, and a desire to maintain the aesthetic appeal of your home. Fortunately, you can easily add functionality and style without making permanent changes to your apartment. DIY towel racks are an excellent way to enhance your bathroom decor while providing a practical solution for keeping towels organized and accessible. This guide presents creative, renter-friendly towel rack ideas that are not only easy on the wallet but also adaptable to various design styles. Whether you prefer a rustic vibe, a modern minimalist look, or something in between, these DIY projects will inspire you to personalize your rental space to reflect your unique style. Let’s dive into the world of DIY towel racks that can make your home both beautiful and functional!
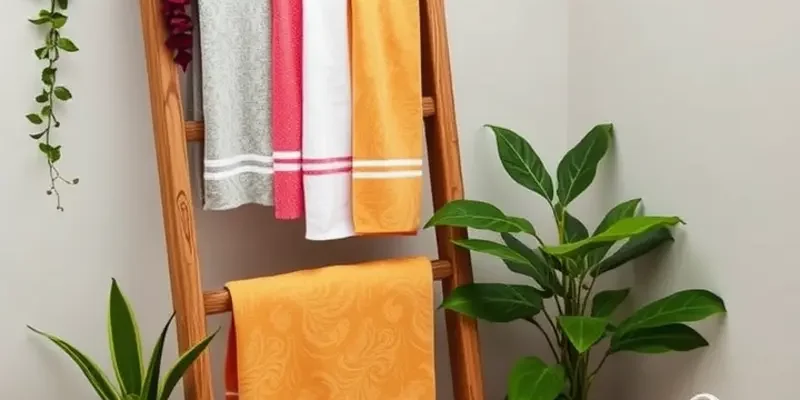
Upcycled Wooden Ladder Rack: Rustic Charm Meets Function
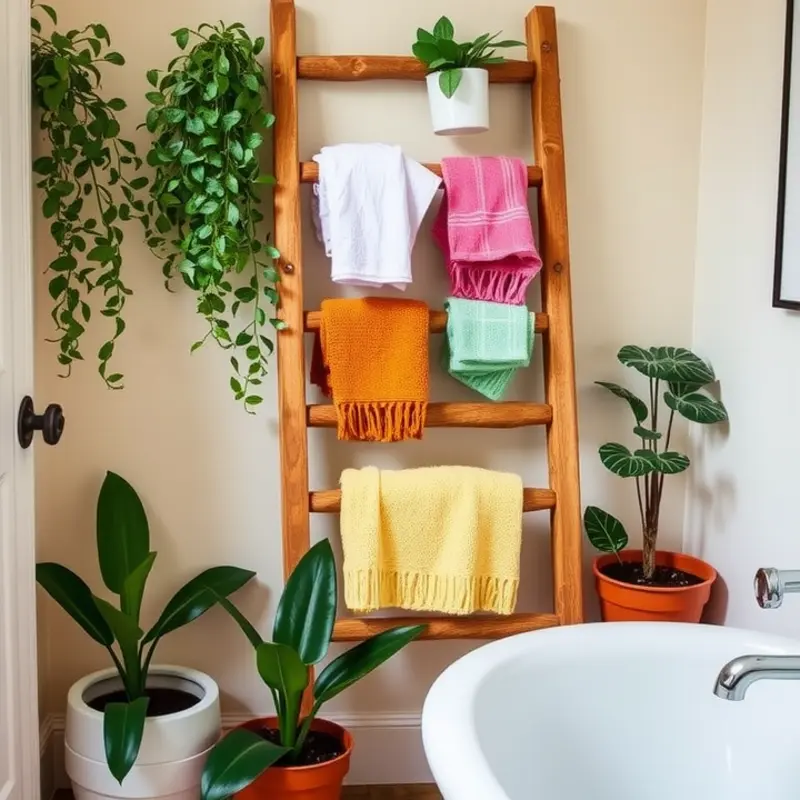
Transforming an old wooden ladder into a charming towel rack is a rewarding project that combines sustainability and style. This idea is ideal for eco-friendly renters who desire a touch of vintage in their bathroom. With this DIY project, you’ll make the most out of vertical space without compromising on aesthetics.
Materials Needed:
- An old wooden ladder
- Sandpaper (medium and fine grit)
- Wood stain or paint (optional)
- Spray polyurethane or sealant
- Protective gloves
- Rags or brush for applying stain
- Anchors and screws for wall mounting
- Drill
Step-by-Step Guide:
-
Select Your Ladder:
A wooden ladder with flat rungs or steps is ideal for this project. If the ladder is too long, you can cut it to fit the available wall space. Consider choosing a ladder that fits your bathroom’s existing decor or one that you can easily customize. -
Prepare the Surface:
Begin by thoroughly cleaning the ladder to remove any dust or dirt. Using medium-grit sandpaper, sand down the entire ladder. This process removes old finishes and ensures a smooth piece. Follow up with fine-grit sandpaper to achieve a smoother texture. If you’re unfamiliar with sanding techniques, our beginner’s guide to renter-safe utensil storage might be helpful. -
Customize with Color:
If you like the natural look of wood, you can skip this step. Otherwise, apply a wood stain or paint, depending on your preference. Ensure even application and allow it to dry thoroughly between coats. This customization step allows you to coordinate your ladder rack with the rest of your bathroom decor. -
Seal the Surface:
Once the paint or stain is completely dry, apply a layer of sealant or spray polyurethane. This step protects the wood from moisture and daily wear. Make sure you’re in a well-ventilated area when applying the sealant, and wear protective gloves to avoid skin contact. -
Mounting the Ladder:
Decide on the location where the ladder will be mounted. Use a drill to secure the ladder to the wall with anchors and screws. Ensure that you are drilling into wall studs for maximum stability. Aligning the ladder vertically maximizes space efficiency, letting you hang multiple towels simultaneously. -
Final Touches:
Once the ladder is mounted, add decorative elements like hooks or small baskets for toiletries. These add-ons provide extra functionality and highlight the rustic charm of your ladder rack.
By integrating an upcycled ladder into your bathroom decor, you not only enhance the space aesthetically but do so sustainably. Each ladder’s unique character brings a distinct aura to any bathroom, ensuring this project will receive compliments from guests and roommates alike. This simple yet effective solution is an excellent illustration of resourcefulness and creativity.
Sleek Wall-Mounted Towel Bar: Modern Minimalism
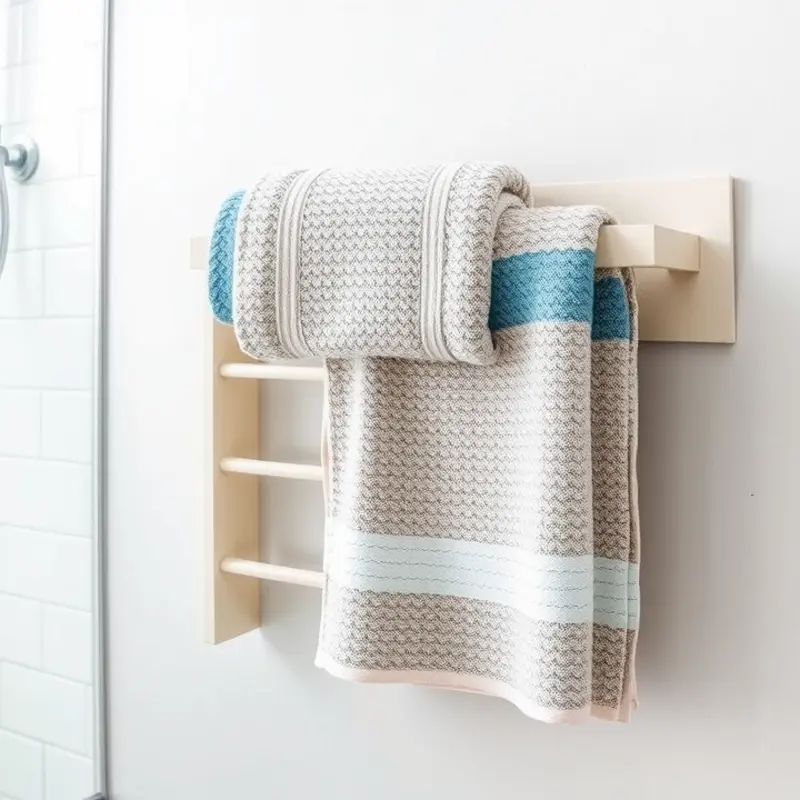
Embrace the elegance of simplicity with a sleek, wall-mounted towel bar that epitomizes modern minimalism. This choice not only enhances the aesthetic of your space but also offers practical benefits, all without infringing on your rental agreement.
Materials Needed:
- Metal rod or dowel, cut to your desired length
- Mounting brackets or hooks
- Wall anchors (suitable for your wall type)
- Screws
- Screwdriver
- Level
- Measuring tape
Step-by-Step Instructions:
-
Measure and Mark
Begin by measuring the desired height for your towel bar. Typically, 48 to 52 inches from the floor is standard for adults. Adjust as needed based on your preference or population. Use a measuring tape and a pencil to mark where the brackets will be installed. -
Choose the Perfect Spot
Be considerate of other elements in your bathroom, like the shower and toilet. Ensure the towel bar won’t interfere with doors or other moving parts. This is a great opportunity to assess the wall’s sturdiness, ideally identifying wall studs which provide extra support. -
Prepare the Wall
If you’re unable to align the towel bar with wall studs, opt for wall anchors, which provide the extra hold necessary for drywall installations. Position your brackets over the marks, and using a level to ensure they’re straight, mark again where the screws will go. -
Drill and Install Anchors
For drywall installations, drill pilot holes where you’ve previously marked and insert the wall anchors. This step ensures your mounting screws will grip securely, even without direct support from a stud. -
Attach the Brackets
Align your brackets with the wall anchors and use screws to secure them. Start with one bracket, confirming it’s level, then move on to the second bracket, ensuring your towel bar will hang evenly. -
Install the Towel Bar
Slide your metal rod or dowel through the brackets. Adjust the bar to make sure it sits securely within the hooks. If desired, you can add rubber end caps to prevent the bar from slipping. -
Final Adjustments
Take a step back and admire your work! Ensure your towel bar is level and securely fastened. Hang a towel on it to confirm its sturdiness and make any minor adjustments as needed.
This minimalist wall-mounted towel bar harmoniously blends form and function, providing not just a utility solution, but also a stylish addition to your bathroom decor. You may explore more ways to personalize your living space on Apartment-Friendly DIY Vanity here. This balance of aesthetics and practicality can significantly enhance both your space and your mood each time you step into your bathroom.
Final words
As you explore these DIY towel rack ideas, remember that the goal is to enhance your rental space without overwhelming it. The right towel rack can be both functional and a standout piece in your bathroom, reflecting your personality and style. Whether you opt for the rustic charm of an upcycled ladder or the sleek lines of a modern towel bar, your DIY projects can significantly impact the aesthetics and organization of your home. With just a few materials and a bit of creativity, you can turn any bathroom into a well-decorated, functional sanctuary that welcomes you and your guests. Take the plunge and start crafting your unique towel racks today — your apartment deserves it!


