
Renting doesn’t mean sacrificing style or practicality, especially when it comes to your beloved makeup collection. Creative renters, young professionals, students, and families can easily personalize their rental spaces with budget-friendly DIY makeup storage solutions. Imagine effortlessly organizing your cosmetics while complementing your apartment’s aesthetics. With just a few supplies and some imagination, you can create captivating storage solutions that reflect your personality and adapt to your living space. From chic wall-mounted organizers to playful drawer dividers, the days of rummaging through cluttered bags are over. This guide will take you through innovative, affordable projects that allow you to express your unique style while maintaining the functionality needed in a busy home. Your makeup deserves a home just as vibrant as you are!
Wall-mounted Wonders: Make Use of Vertical Space
Transforming wall space into functional and chic storage areas is a game-changer for makeup lovers living in apartments. Consider using vertical surfaces as blank canvases that await your creative touch. With inventive solutions, you can design a personalized space that keeps your beautifying essentials organized and accessible.
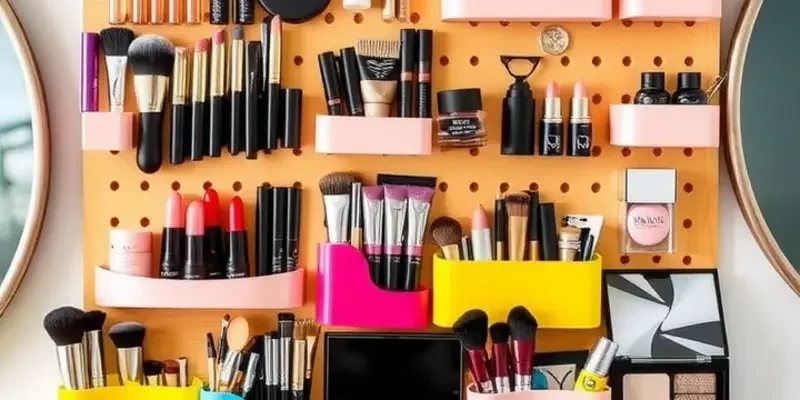
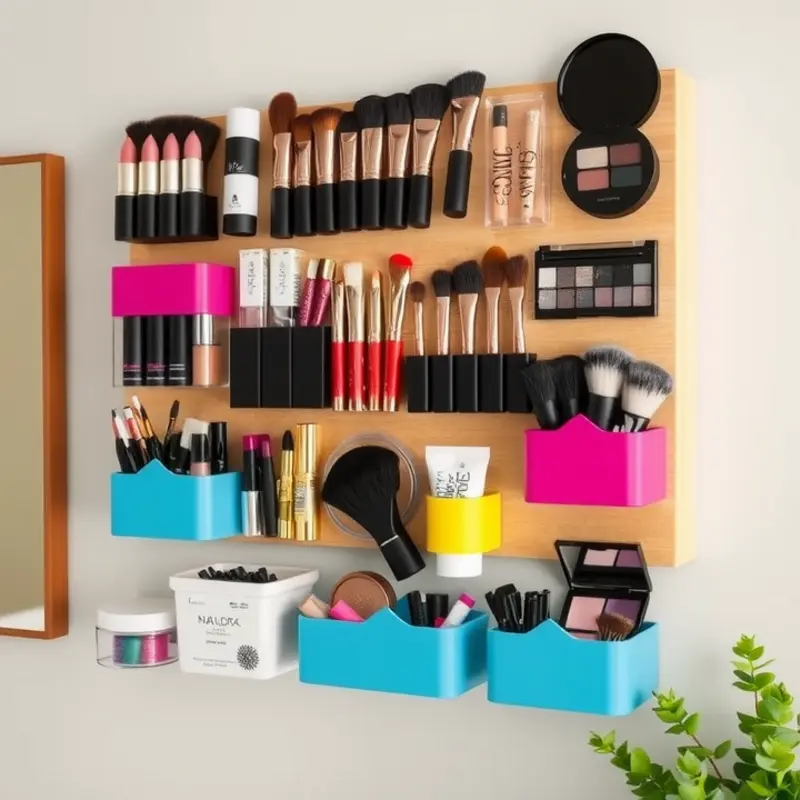
To start, pegboards offer a versatile option for arranging your makeup tools. By using hooks and holders, you can create custom configurations that fit both your space and needs. These boards are simple to mount and can easily adapt to changing trends or preferences, making them ideal for renters who wish to avoid permanent alterations. Ensure you select a lightweight board, and use appropriate wall fixings to protect your walls.
Shelving units are another fantastic way to utilize vertical space without breaking the bank. Opt for renter-friendly shelves that you can install without power tools. Floating shelves provide a sleek, minimalist look that matches various decor styles. By staggering shelves, you can add visual interest while accommodating items of different sizes.
For a softer approach, hanging baskets or wall-mounted organizers made from fabric or lightweight materials offer both function and aesthetics. These can hold miscellaneous items like makeup brushes or skincare products. Choosing neutral colors or matching your apartment’s theme can seamlessly integrate these pieces into the existing decor.
Here’s a simple step-by-step guide to setting up your wall-mounted makeup storage:
- Measure Your Space: Determine the available wall area to ensure your chosen storage solution fits without cluttering your space.
- Choose Your Materials: Select between pegboards, shelving, or fabric organizers based on your style and needs. Look for renter-safe mounting options that will not damage walls.
- Organize Your Makeup: Group makeup items by category. Decide which items you use frequently and require easy access.
- Plan the Layout: Before mounting, sketch a layout for your storage arrangement. Play with configurations to optimize both functionality and style.
- Install Thoughtfully: Follow installation instructions carefully. For pegboards, ensure hooks are secure, and shelves should be leveled to prevent items from tipping.
- Style Your Space: Once installed, add decorative elements like small plants or artworks to enhance the aesthetic appeal.
For more ideas on safe and damage-free installation, explore our tips on renter-safe wall hooks, which offer a myriad of adaptable mounting solutions.
Remember, the key to a successful wall-mounted setup is balance. Combine practical storage with personal touches to create a space that’s uniquely yours, making daily routines not just efficient but delightful.
Drawer Dividers: Create Order from Chaos
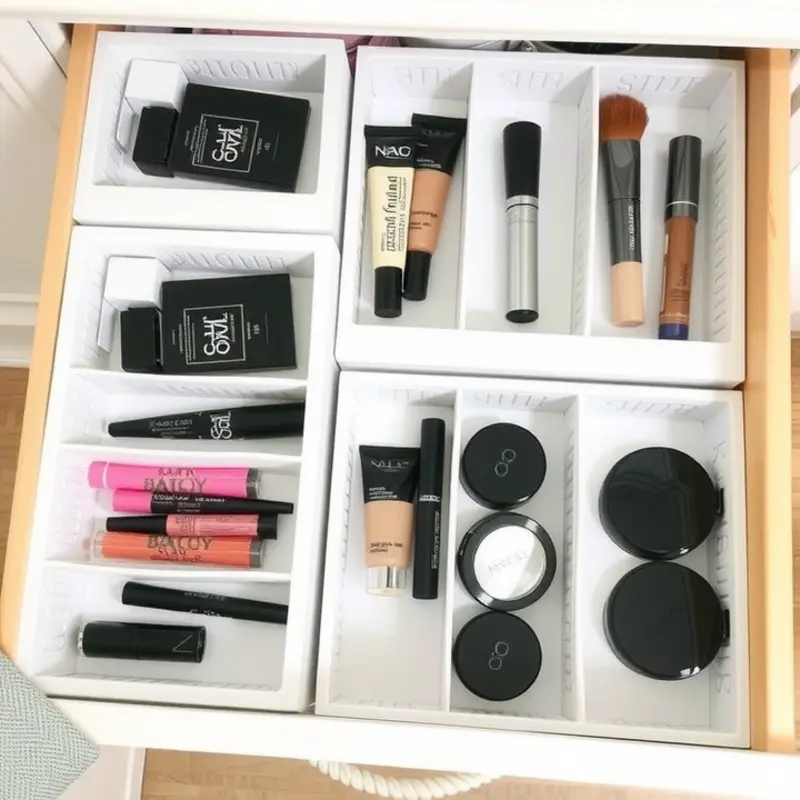
Transforming a chaotic makeup drawer into a streamlined haven doesn’t require breaking the bank. With a few DIY techniques, you can achieve an organized system that makes beauty routines smooth and efficient. The secret lies in the art of customized drawer dividers, using materials you may already have at home.
Begin by gathering cardboard, foam board, or even sturdy plastic that you’ve saved from packaging. These materials are excellent for crafting dividers, lending structure without the cost. First, empty your makeup drawer entirely to measure the interior dimensions accurately. With a ruler or measuring tape, note the length, width, and depth to ensure your dividers fit perfectly and do not interfere with the drawer’s functionality.
Next, categorize your makeup items. Consider separating them into groups like lipsticks, eyeshadows, and brushes. Visualize or sketch a layout for your dividers that accommodates these different sections. This map will guide your cutting and assembly.
Once you’ve planned your layout, it’s time to cut your materials. If you’re using cardboard, a utility knife or scissors will work well. For thicker materials like foam board, a sharp craft knife will be more effective. Cut the panels to size based on your measurements, ensuring that the pieces fit snugly inside the drawer and between defined sections.
To assemble, start by placing the bottom layers, and then slot the vertical dividers in according to your layout. Depending on your choice of materials, you may need a small dab of glue or double-sided tape to secure the pieces in place. Make sure each divider is secure enough to hold the weight of your makeup.
A clever trick is to use washi tape or scrap paper to add a personal touch to your dividers. This not only enhances the aesthetic appeal but also strengthens the edges. It’s an easy way to bring color and style into your drawer organization.
Drawer dividers are especially beneficial for renters because they are non-invasive and easily removable. Should you wish to rearrange or upgrade, simply pull them out and start over without leaving any marks or damage. For additional renter-friendly DIY solutions, you might explore how renter-safe hooks can further optimize your space by checking this guide.
By adopting these DIY habits, your daily beauty routine will become not only more visually pleasing but also time-efficient. Embrace the organization and celebrate a clutter-free start each day, knowing exactly where every item belongs.
Final words
Revamping your makeup storage in a rental space can be both fun and fulfilling. The joy of personalizing your environment with DIY solutions not only enhances the aesthetics of your home but also brings efficiency to your daily routine. By utilizing wall spaces creatively and optimizing your drawers with custom dividers, you can enjoy a beautifully organized makeup collection that reflects your style. Remember, the key is to think outside the box and use materials that resonate with you. Don’t limit your creativity—turn your rental into a chic haven that you’ll love coming home to for years!


