In the realm of rental living, spaces can often feel impersonal and uninspired. Young professionals, students, families, and creative renters alike desire ways to carve out a sense of home in a place that isn’t truly theirs. One of the most delightful and practical DIY projects you can undertake is creating a bath caddy. These functional yet stylish additions not only elevate your bathing routine but also add a touch of personal flair to your bathroom. Whether you’re looking to store your favorite bath essentials or showcase lovely décor, a DIY bath caddy offers endless possibilities. Using readily available materials, you can design a caddy that fits your style and needs. This guide offers a step-by-step approach to crafting your dream bath caddy, ensuring that it’s not just practical but a true reflection of your unique taste. Let’s dive into the world of creativity and functionality as we create an inviting atmosphere right in your very own bathroom.
Crafting the Ultimate Wooden Bath Caddy
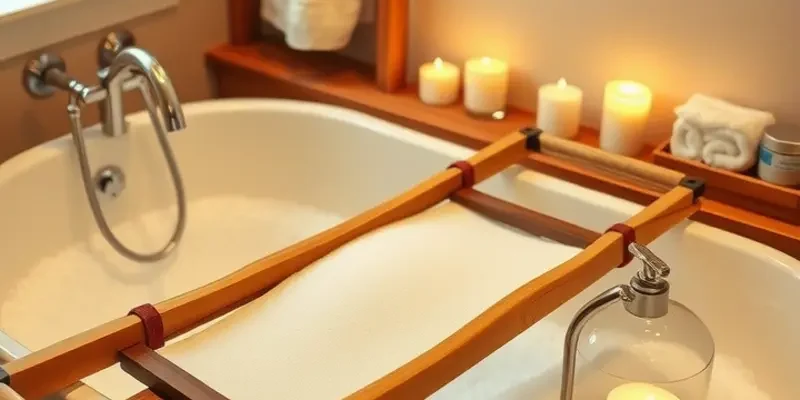
Creating a wooden bath caddy to enhance your bathroom space is both rewarding and simple. This project not only fulfills a practical need in your bathing routine but brings a personal touch to your bath time sanctuary. Let’s dive into crafting a unique caddy that aligns with your aesthetic while maintaining durability.
Begin by gathering your materials. You’ll need wooden boards, wood screws, wood glue, sandpaper, paint or stain, and a brush. Selecting the right wood is pivotal. Opt for reclaimed wood if you wish to incorporate environmentally-friendly elements into your design. Reclaimed wood presents distinct grains and textures that add character to your caddy.
Measure the width of your bathtub to ensure the base platform sits securely across. You’ll also need two smaller pieces for the sides. These will prevent your items from sliding off, providing extra functionality. Cut the wood to your desired dimensions carefully. Precision here is crucial to maintain a balanced and stable caddy once assembled.
With the pieces cut to size, arranging and assembling them is next. Use wood glue to attach the sides to the base. Apply wood screws for added security, ensuring the structure holds firm against the weight of items placed on the caddy. This combination of glue and screws provides a strong attachment, preventing any accidental disassembly over time.
Once assembled, sand the edges thoroughly. This step not only highlights the wood’s natural beauty but ensures a smooth, splinter-free finish. Sanding is especially important for reclaimed wood, as its surface can often be rougher in texture.
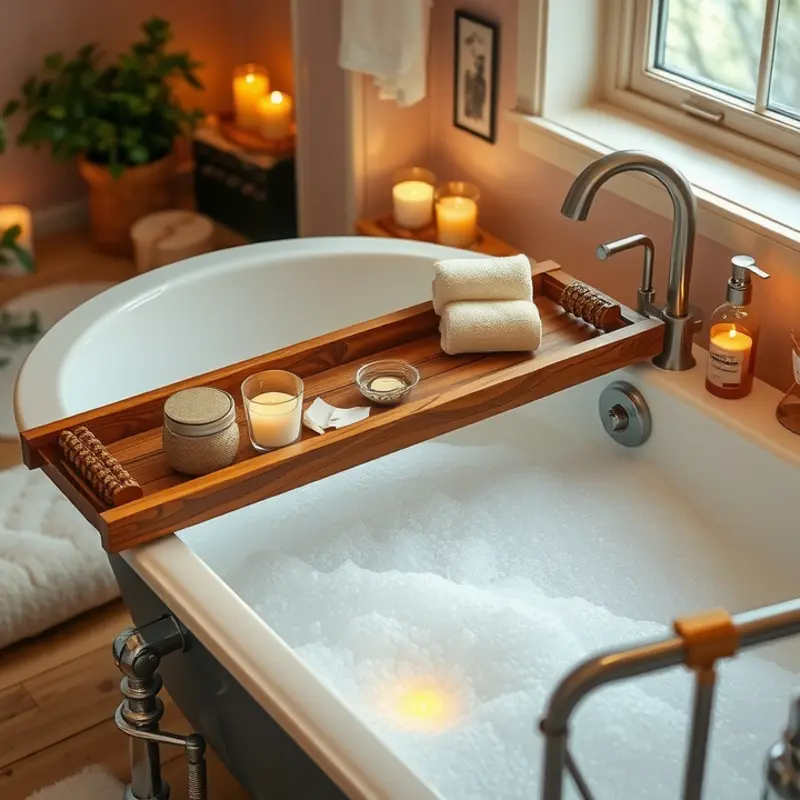
With your caddy smoothly sanded, it’s time to customize. Choose a paint or stain that will match or complement your bathroom’s color scheme. A satin white finish can create a sleek, clean look, while darker stains can enhance the rustic appeal of the wood. Applying paint can highlight the wood’s grain patterns and flaws uniquely, transforming each piece into a work of art. Be sure to allow the paint or stain to dry fully before proceeding.
Finish the project by applying a layer of varnish. This seals the wood and provides waterproof protection, essential for longevity in damp bathroom environments. The varnish also adds an elegant sheen, elevating the overall finish.
Now your wooden bath caddy is ready for use. From holding candles to bath bombs, this personalized addition not only enhances the aesthetic appeal of your bathroom but increases its functionality. It’s a project that not only encourages sustainability through the use of reclaimed materials but also showcases your individual style.
For those looking to further personalize their living spaces in similar creative and renter-friendly ways, you might find inspiration in apartment-friendly DIY pantry organizers. This could complement the aesthetic of your newly crafted bath caddy and help you organize other parts of your home efficiently.
Stylish Minimalist Metal and Rope Caddy
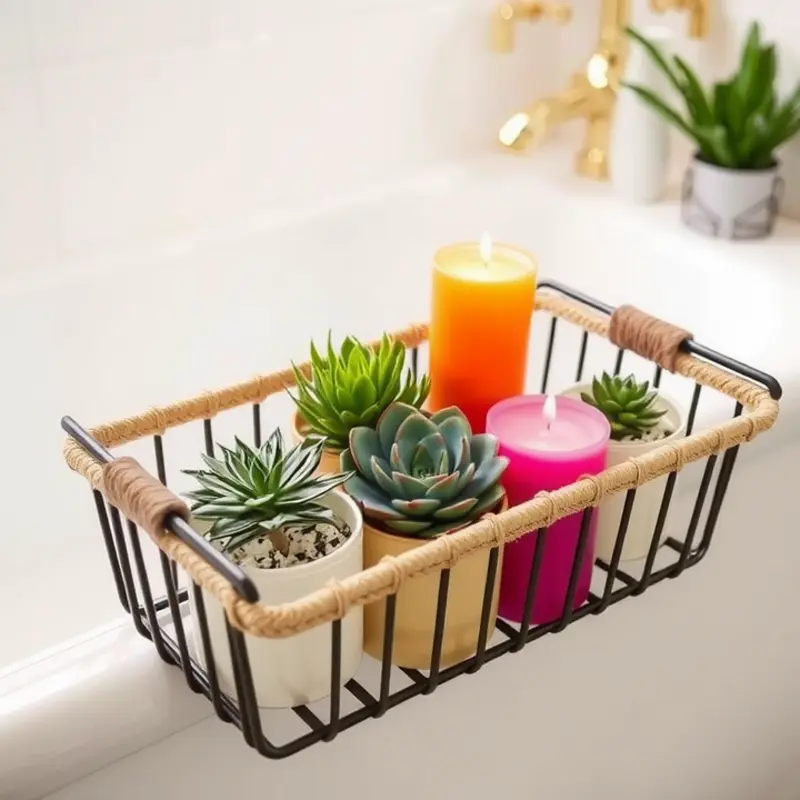
Crafting a stylish metal and rope caddy can enhance both the functionality and aesthetic of your bathroom. This minimalist project offers a modern, sleek look that suits various décor styles, making it a versatile addition to any apartment.
Materials Required:
- Metal tray
- Jute rope
- Strong adhesive or hot glue gun
- Optional decorative elements: small potted plants, candles, or reading material
Step-by-step Guide:
-
Prepare the Tray: Begin by laying a metal tray flat on a surface. Choose a tray with clean lines and a smooth finish to best capture the minimalist aesthetic.
-
Measure and Cut the Rope: Measure out two equal lengths of jute rope. These pieces will act as handles, so ensure they’re long enough for easy carrying but not too long to avoid bulkiness.
-
Attach the Rope Handles: Using a strong adhesive or hot glue gun, attach the ends of each rope piece to the opposite sides of the tray. Apply pressure and allow the adhesive time to set completely before moving the tray. This ensures your handles are secure and capable of supporting weight.
-
Personalize Your Caddy: Once your handles are securely attached, it’s time to personalize your caddy. Consider placing decorative items like small succulents, scented candles, or stacks of magazines and books. These additions not only make the caddy distinctively yours but also elevate its role as both a practical tool and decorative piece.
Tips for Enhanced Aesthetic Appeal:
- Opt for a galvanized metal tray for a rustic touch, or choose stainless steel for a modern look.
- Selecting a rope color that complements your bathroom’s color scheme can tie the look together.
- Integrate this caddy with other bathroom organization tools for a cohesive look. You might find ideas from DIY projects like pantry organizers to further enhance your space.
With these steps, your minimalist metal and rope caddy will become both a focal point and a functional element in your bathroom. This project not only proves rewarding in its creation but also offers practical perks, making it a worthwhile addition to any renter’s home.
Final words
Crafting your own bath caddy not only allows you to personalize your rental home but also enhances your daily self-care routine. These projects are simple, affordable, and can be done with materials that you might already have at home or can easily procure. Each bath caddy serves as a delightful reminder of your unique style and can significantly elevate your bathing experience. Plus, these caddies make great gifts for friends and family looking to add a touch of home to their own spaces. So, roll up your sleeves, grab your materials, and start creating a functionality-meets-style piece that will bring joy to your everyday moments.