Renting doesn’t mean you have to compromise on style, and what better way to showcase your personality than with a beautifully crafted wall clock? DIY clock projects are an effective way to personalize your space without damaging walls or breaking the bank. With creative ideas that cater to a range of tastes—from minimalistic to quirky—you can make statement pieces that reflect who you are. This guide will inspire renters, young professionals, students, and families alike to embrace their creative sides and craft unique timepieces that integrate perfectly into their living environments. Get ready to transform an ordinary clock into a vibrant expression of your personal style while also making a great, functional addition to your home.
Nature-Inspired Wall Clock with Wood Slice
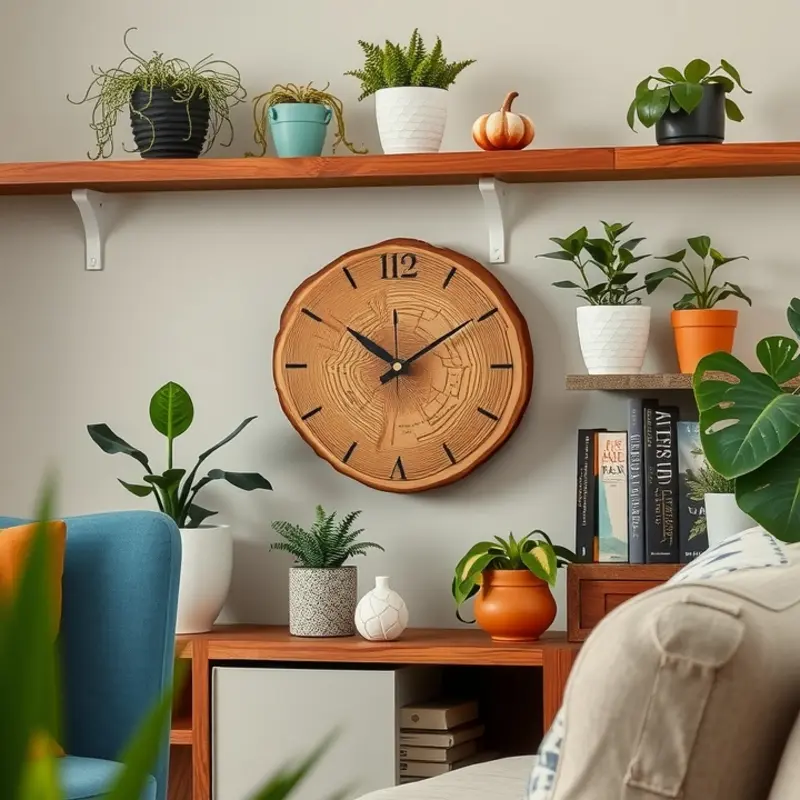
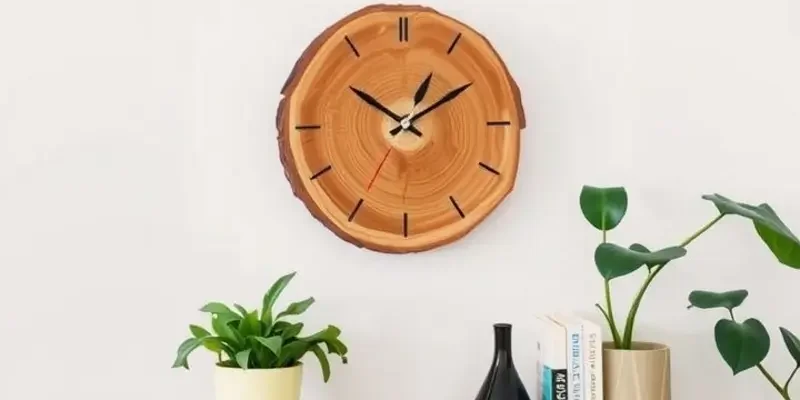
Crafting a one-of-a-kind wall clock adds both functionality and warmth to your living space. In this chapter, we’ll transform a wooden slice into a charming timepiece using simple materials perfect for apartment customization.
Begin by selecting a wood slice that suits your taste. You can find wood slices in various shapes and sizes, each offering its own unique texture and character. Aim for a slice with a smooth surface that is large enough for your chosen clock hands.
Materials Needed:
- Natural wood slice
- Clock mechanism kit
- Number stencils or stickers
- Acrylic paint and brushes
- Drill with a wood-boring bit
- Sandpaper
- Clear sealant
Preparation and Drilling
Before you start, make sure to sand the surface lightly to remove any rough edges or debris. Once your wood slice is smooth, find the center and mark it where the clock mechanism will be installed. Use a drill to create a hole for the clock movement. Ensure the bit size corresponds to the requirements of your clock kit.
Design and Paint
Once the hole is drilled, lay out your design plan. Use number stencils or stickers to mark each hour around the slice’s perimeter. Acrylic paint is ideal for adding the numbers. Choose colors that complement your decor — earth tones or bold hues, depending on the room’s ambiance.
Be patient with this step. Utilize brushes of various sizes for precision. Allow the paint to dry completely before proceeding. This pause gives you time to admire the emerging rustic artistry.
Assemble the Clock
Upon drying, insert the clock mechanism through the back of the wood slice, aligning the hands accordingly. Following the kit instructions, secure the mechanism in place. Some kits require a nut or washer for secure attachment, ensuring the hands move freely without obstruction.
Finishing Touches
To protect your art piece, apply a clear sealant over the front of the wood slice. This topcoat not only accentuates the natural beauty of the wood grains but also guards against wear and tear. Let the sealant dry thoroughly before mounting.
Mount and Enjoy
Install a hanging hook or adhesive strip that can support your clock’s weight. The hanging method should mirror your living space’s aesthetic and practical needs. See more DIY home solutions here.
And there you have it, a beautifully rustic wall clock effortlessly bringing a slice of nature into your home. This creation not only keeps time but also serves as a daily reminder of the tranquil serenity only nature can inspire.
Upcycled Vinyl Record Clock for Music Lovers

Reimagining your old vinyl records as a wall clock is a harmony of art and functionality, perfect for music enthusiasts aiming to blend personal taste with practical decor. To begin this creative journey, you’ll need a few tools and materials: a vinyl record of your choice, a clock mechanism kit, a drill with a small bit, and adhesive. Optionally, gather paint, stencils, or decals for personalizing your clock face.
Start by selecting a vinyl record that holds personal significance or displays a unique design. Once chosen, prepare the record for conversion. Be aware that drilling through vinyl requires a steady hand, so position the record on a supported surface and use gentle pressure with your drill to create a hole at the center label.
Next, assemble the clock mechanism. Most kits come with straightforward instructions, usually requiring you to first mount the clock’s hands onto the mechanism. Make sure to align the hands correctly so they do not overlap; this ensures smooth motion without obstruction.
Once the mechanism is prepared, install it through the hole you drilled in the center of your record. Secure it on the back with the provided washer and nut. Depending on your taste, you might prefer discreet black or metal clock hands to maintain a classic look or choose bright, contrasting shades for a pop of color.
Here’s where your personal flair comes into play. Painting the record can add an unexpected twist to its appearance. If the original album art holds sentimental value, leave it visible and add subtle clock numbers instead. Alternatively, use stencils to paint meaningful symbols or numbers. Decals are an efficient way to add intricate designs or inspirational quotes.
Maintaining the clock’s appeal is key for long-term enjoyment. If you opt for a complex design, clean and dust your clock regularly to ensure that any adhesives or decorations remain secure. Also, remember to occasionally replace the batteries and adjust the clock during daylight saving time changes.
This project not only offers a rewarding creative outlet but also contributes to sustainable living by keeping beloved records out of landfills. For those who value a tidy living space, consider exploring apartment-friendly organization tools that can further enhance your home’s aesthetic while keeping your DIY spirit alive.
Finally, display your upcycled clock in a prominent spot where its charm and significance can be appreciated daily. Whether it sparks conversations in your living room or quietly ticks away in your workspace, this project is a testament to your creativity and love for music, all while being a manageable endeavor for any apartment dweller.
Final words
Crafting your own clocks not only adds a personalized touch to your rental home but also encourages you to tap into your creative spirit. These DIY projects are accessible, affordable, and can be completed in a weekend, making them perfect for renters and families. Whether you lean towards a nature-inspired design or a fun music-themed clock, the possibilities are endless. So gather your materials, and let your creativity shine, as time ticks away beautifully in your new home.