Finding a coffee table that suits both your style and your rental limitations can be challenging. Here, we dive into fun and functional DIY renter-friendly coffee table projects tailored for creative renters, young professionals, students, and families. These projects are not only affordable and easy to execute, but they also allow your unique style to shine in your living space. Whether you prefer rustic charm, modern minimalism, or something entirely unique, these ideas will inspire you to transform your apartment without breaking the bank or violating your lease. Let’s explore two fabulous DIY projects that will bring both functionality and creativity to your living room, ensuring your rental feels like home while also being easy to dismantle when it’s time to move. Grab your tools, unleash your creativity, and let’s get started!
Upcycled Wooden Crate Coffee Table
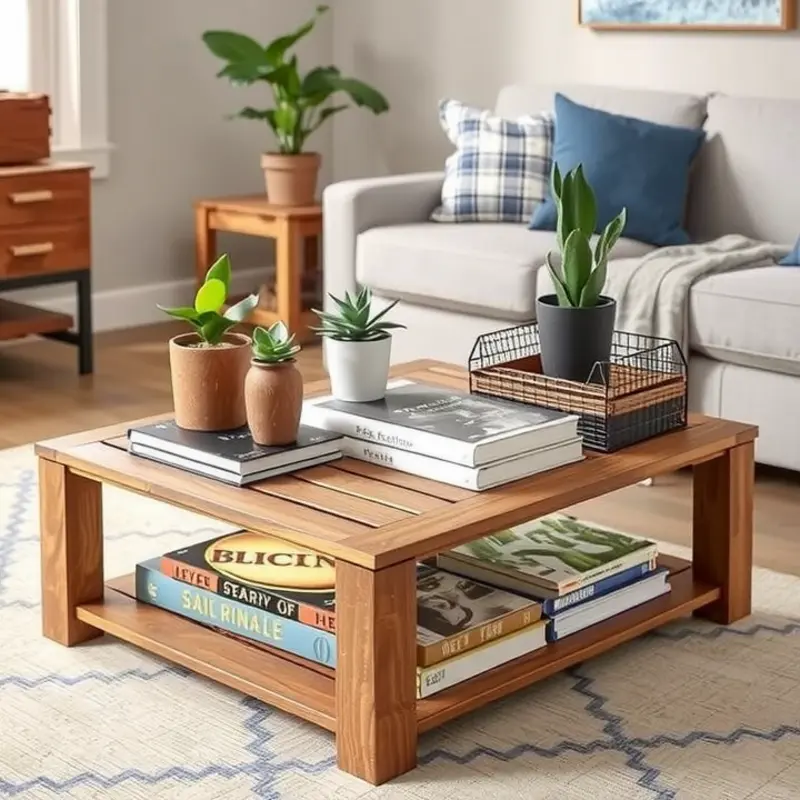
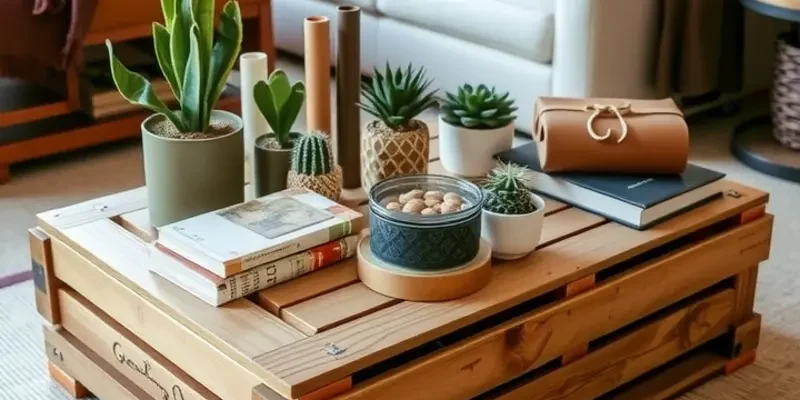
An upcycled wooden crate coffee table is both an economical and stylish addition to any living space. This DIY project not only infuses rustic charm into your home but also serves a practical function with its added storage capabilities. Here’s how to create your own using simple, budget-friendly materials.
Materials Needed:
- Four wooden crates: Look for sturdy crates at a local flea market or second-hand store.
- Sandpaper or a power sander
- Wood stain or paint of your choice
- Paintbrush and foam roller
- Wood screws and screwdriver
- Four caster wheels (optional for mobility)
- Measuring tape
- Drill
Step 1: Gathering Materials
Before diving into the project, ensure you have everything at hand. Repurposing wooden crates is an eco-friendly way to keep costs down while being kind to the environment. If your crates are uneven or worn out, consider giving them a light sanding.
Step 2: Preparing the Crates
Start by sanding each crate to smooth out any rough edges and remove old finishes. If you don’t have a power sander, a coarse sandpaper will also do the trick. This prep work is crucial for a clean, polished look.
Once your crates are sanded and dust-free, apply the stain or paint. Use a paintbrush for detailed work and a foam roller for larger areas. Opting for a wood stain will enhance the natural beauty of the wood, while paint provides a pop of color. Allow them to dry completely before moving to the next step.
Step 3: Designing the Layout
Arrange the crates on the floor to determine the best configuration. A square layout, with openings facing outwards, is ideal for added storage. You can play with different formations until you find what fits your space best.
Step 4: Assembling the Table
With a layout decided, secure the crates to one another using wood screws. Pre-drill your holes to avoid splitting the wood. If you want the table to be mobile, consider adding caster wheels to the underside.
Step 5: Finishing Touches
Once assembled, give the entire table another coat of stain or paint if needed. This adds resilience and a finished look to your piece. If you added wheels, test the mobility to ensure they are secure.
Storage Perks and Decorative Ideas:
The spaces created by the openings are perfect for books, magazines, and plants. Adding depths of decor is where you can imbue your personal style. Consider integrating some DIY plant shelves for additional greenery and vibrance: DIY Plant Shelves.
Design a chic, versatile coffee table that complements any living arrangement, highlighting your unique taste and practical needs. Not only is this table budget-friendly and renter-friendly, but it’s also a weekend project that offers a rewarding sense of accomplishment.
Personalized Stenciled Coffee Table
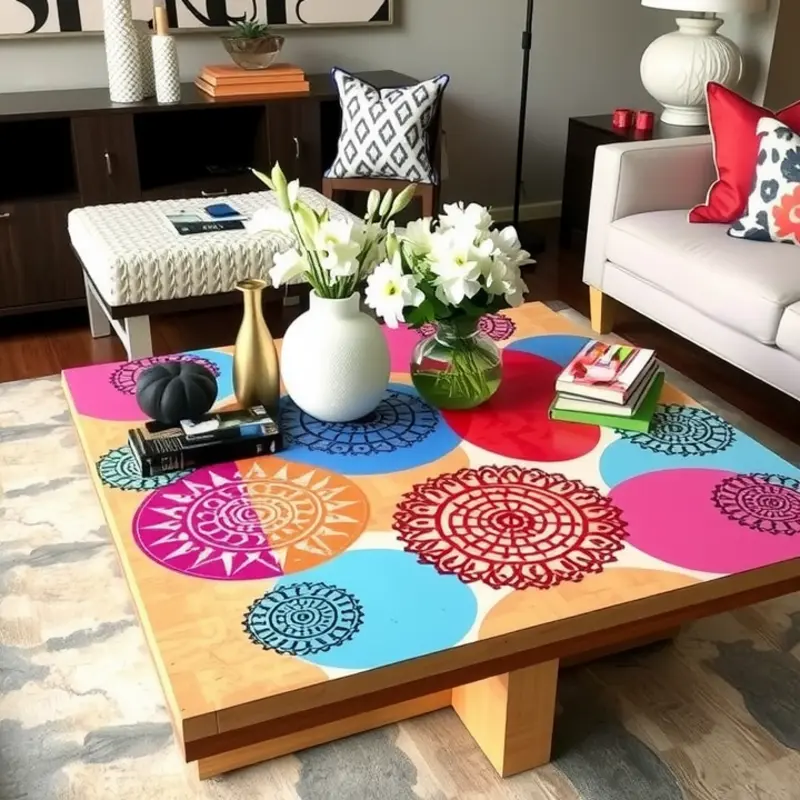
Creating a personalized stenciled coffee table is a great way to bring character into your living space without breaking the bank. The process allows you to express your style while adding a chic, customized touch to your home decor. Suitable for families and creative individuals alike, this project is both fun and functional.
Begin by selecting the right basic table for your upcycling venture. Look for a table with a smooth, flat surface, as this will make the stenciling process much easier. Second-hand stores, thrift shops, or even online marketplaces can be treasure troves for budget-friendly options. Remember, the more neutral the table, the better the stencil will stand out.
Next, gather your stenciling materials. You’ll need stencils in your desired patterns or themes, paint in colors that complement your existing decor, and the necessary tools such as brushes or sponge applicators. Consider investing in stencils that are reusable, allowing you further personalization projects down the line. For unique patterns, try mixing geometric shapes with florals for an eclectic vibe.
Before you start painting, prep the table surface. Clean it thoroughly, removing any dust or grime that could interfere with the paint. If the table has a glossy finish, gently sand it to help the paint adhere better. Once the surface is clean and dry, position your stencil and secure it with painter’s tape to prevent any unwanted movement during painting.
Apply the paint carefully using a brush or sponge, tapping lightly to build up the color without pushing paint under the stencil’s edges. Less is more in the initial application. You can always add more layers to achieve your desired depth of color. If you find your creative side taking over, don’t hesitate to experiment with ombre effects or metallic shades for added dimension.
After your paint has completely dried, carefully lift the stencil off, revealing your masterpiece. Be patient, as rushing this step could result in smudges. Once you’re satisfied with the design, it’s time to seal your work. Use a clear, protective sealant or topcoat to ensure durability. This step is crucial for protecting the paint against wear and tear, especially in a busy household.
Finally, let the sealant dry completely before using your newly decorated table. To further enhance your coffee table’s appeal, consider pairing it with other DIY decor elements, like these DIY plant shelves. This can create a seamless and personalized theme throughout your space, making your personalized coffee table a stylish addition to your renter-friendly home.
Creating a stenciled coffee table not only embellishes your living area but also reflects your personality and creativity. With the flexibility to easily alter the design to suit changing tastes, this project both enhances and personalizes your home environment.
Final words
Implementing these DIY projects not only enhances your living space but also allows you to express your style while sticking to your budget. From the rustic charm of an upcycled crate to the colorful creativity of a stenciled tabletop, these coffee table ideas are designed to inspire creativity while ensuring a renter-friendly approach to home decor. Remember, your living space should reflect who you are, no matter where you reside. So, gather your tools, personalize your coffee table, and watch your rental feel like a home that resonates with your unique taste!