In today’s world of remote work and online learning, having a dedicated workspace is essential, especially for renters. But with many renting restrictions, creating an inspiring workspace can feel daunting. Enter the DIY floating desk! These stylish, renter-friendly solutions allow you to personalize your space without the fear of losing your security deposit. Floating desks bring functionality and flair, transforming any nook of your home into a productivity hub. Whether you’re a creative professional, a student on a mission, or a busy family looking for an organized home, these simple desk projects are perfect for optimizing your space. With minimal equipment and easy-to-follow steps, you can create a floating desk that suits your style and needs. This article will guide you on how to build your own floating desk while exploring innovative ideas to personalize and enhance your atmosphere. Let’s get started on a project that not only serves a practical purpose but also reflects your unique aesthetic!
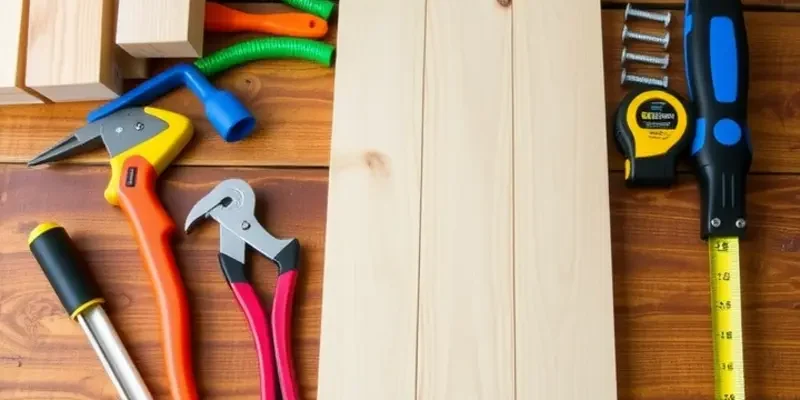
Materials You’ll Need for Your Floating Desk
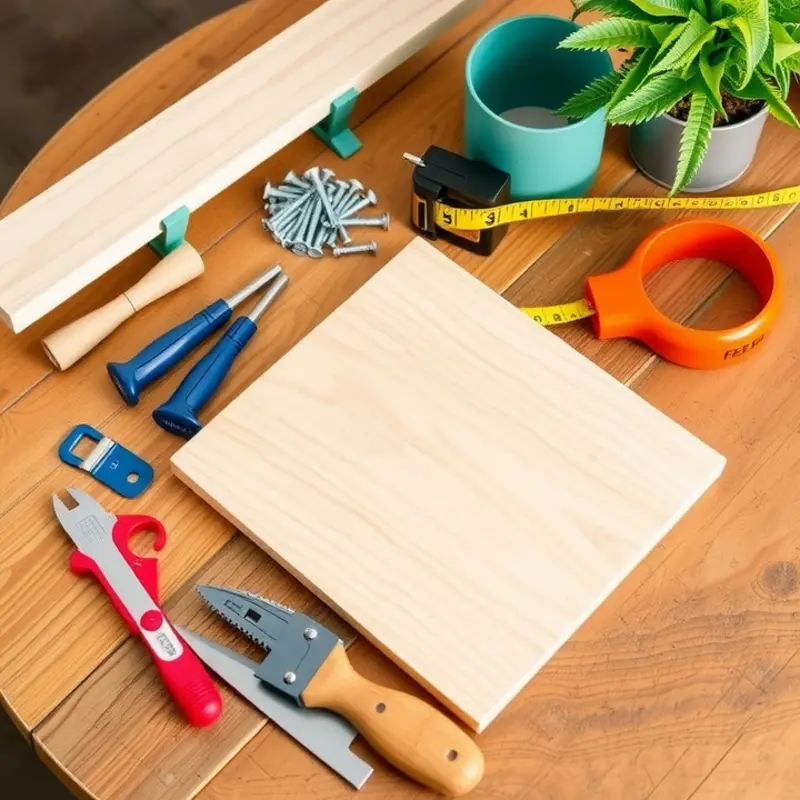
Embarking on your DIY floating desk journey begins with the right materials. Selecting suitable wood is crucial for both durability and aesthetics. Pine and birch plywood are excellent choices; they are affordable, easy to work with, and widely available. For a more luxurious finish, consider oak or walnut, which offer rich textures and tones.
The next element to focus on is securing the desk firmly to your wall. Brackets and mounting systems designed for floating shelves offer seamless support. Choose heavy-duty brackets to accommodate the weight of your desk and any objects you plan to place on it. Adjustable brackets can help you set the perfect height for your workspace. Use at least two brackets for a standard desk, more if you require additional support.
For effective mounting, you’ll need quality screws and anchors. Invest in drywall anchors if your walls are plaster or standard drywall. Anchors ensure the screws hold firm, preventing the desk from sagging or detaching. Check your wall type before purchasing, as some anchors are specific to certain materials.
Tools are your best friend in this project. A drill is essential for securing brackets. Ensure it is equipped with appropriate drill bits for your wall type. A level will help ensure your desk is perfectly horizontal. A measuring tape is vital for getting precise dimensions; you wouldn’t want a crooked desk. Additionally, a stud finder can determine the best placement by locating wall studs, providing extra support for your installation.
Once assembled, it’s time to finish your desk. Stain or paint it to match your personal style. Staining brings out the natural beauty of the wood while offering protection. If you prefer a more modern or bold look, opt for paint; finish with a sealant to enhance durability. Whether you lean towards a rustic charm or a sleek contemporary vibe, the right finish transforms your desk from a mere utility to a centerpiece of your home office.
Incorporating personal touches is a crucial step in personalizing your desk. Consider adding cable management systems to keep your workspace tidy. You might also integrate LED strip lights underneath for an ambient glow, making long work hours more pleasant.
Having now discussed the essential materials and tools, you are well-prepared to create your floating desk. This endeavor not only boosts your DIY skills but also turns a simple rental space into a personalized sanctuary. If you enjoy DIY projects, consider exploring other home improvements to further customize your rental space.
Step-by-Step Guide to Building Your Floating Desk
Creating a floating desk is a rewarding DIY project that can elevate your rental space. Begin by carefully measuring the wall space where you plan to install the desk. Ensure the dimensions fit both your needs and the room’s layout.
1. Measure and Mark
With a tape measure, determine the length and width of your desired desk area. Use a level to draw straight lines on the wall where the desk will be mounted. It’s crucial to double-check these marks to ensure symmetry and balance.
2. Cut the Wood
Choose a sturdy wood board that fits your measurements. A circular saw or a hand saw will suffice for this task. Sand down the edges for a smooth finish, avoiding any splinters.
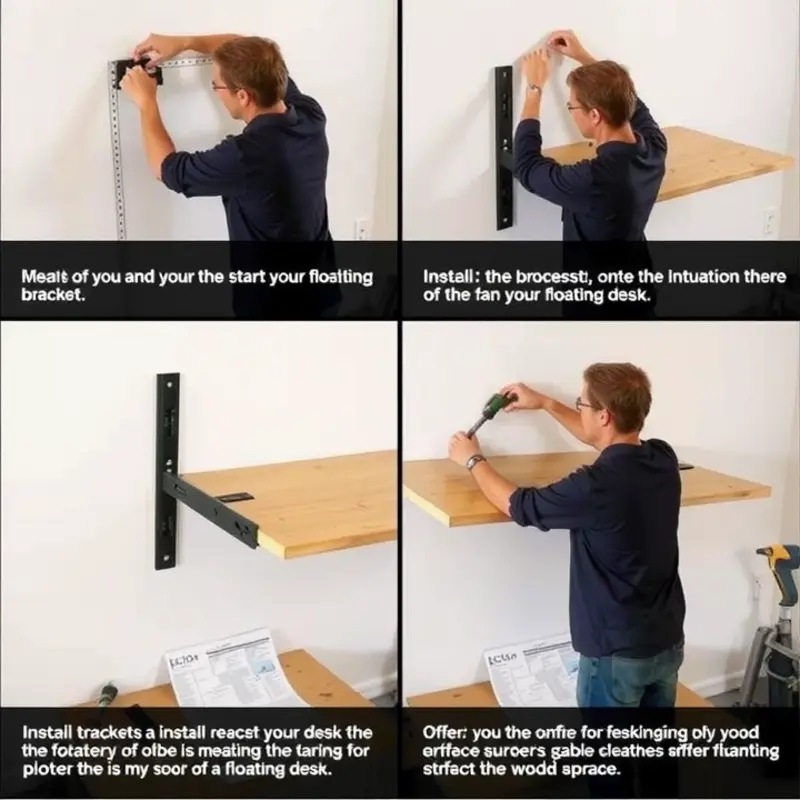
3. Install the Brackets
Select heavy-duty brackets that can support the weight of your desk materials plus any additional load, like a computer or books. Drill the brackets into the wall at your marked points, making sure to hit studs for maximum stability. If no stud is available, use appropriate wall anchors.
4. Secure the Desk Surface
Place the cut wood board onto the mounted brackets. Use wood screws to secure the board to the brackets firmly. Ensure the desk surface is level to prevent items from rolling off. A bubble level can be very helpful at this stage.
5. Safety Tips
Periodically check the integrity of the brackets and the wall mounting. This will ensure your safety and prolong the desk’s usability. For more in-depth safety tips on home projects, check out our guide on renter-safe ladders.
6. Personalize Your Desk
Paint the surface to match your room’s color scheme or apply a wood stain for a more natural look. Peel-and-stick wallpaper or decals can add an extra layer of creativity without permanency.
7. Add Decorative Elements
Incorporate your personality with desk accessories. Consider floating shelves above the desk for extra storage and decoration opportunities. You can place houseplants, picture frames, or books to give your space a welcoming feel.
A DIY floating desk is not only a functional addition but also a chance to showcase your personal style without permanent alterations to your rental. By following these steps, you can achieve a professional-looking setup that enhances your living space.
Final words
Completing your DIY floating desk not only provides a functional workspace but also personalizes your rental home in an affordable way. These creative desks enable you to conquer clutter while expressing your unique style, making your space truly feel like home. With just a little elbow grease and creativity, any nook can become an inspiring office. Enjoy the pride of your accomplishment and make the most of your new workspace – it’s time to thrive in style!