Renting a home shouldn’t mean giving up on style and creativity, especially in the kitchen where you whip up meals and make memories. A removable backsplash offers an excellent opportunity to showcase your personality, elevate the aesthetics of your space, and maintain the flexibility you need as a renter. With innovative materials and a variety of designs available, creating a stunning, protective backsplash that can be easily removed is simpler than ever. In this guide, you’ll find step-by-step instructions and inspiring ideas to customize your kitchen backdrop with minimal effort and a small budget—perfect for students, young professionals, creative renters, and families alike. Say goodbye to bland and hello to beautiful as we dive into the world of DIY removable kitchen backsplashes.
Inspiration and Materials for Your Dream Backsplash
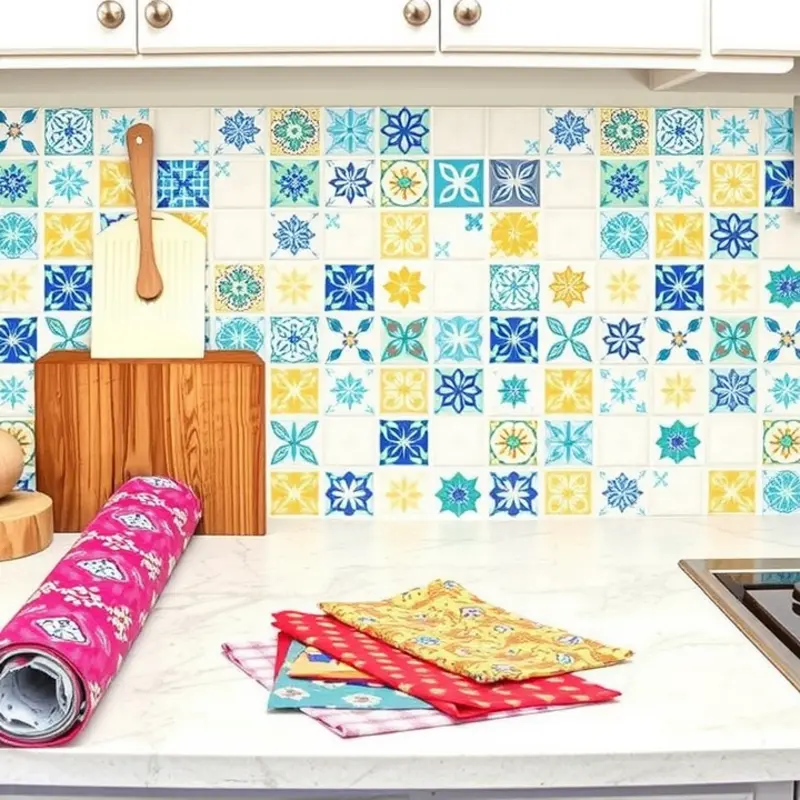
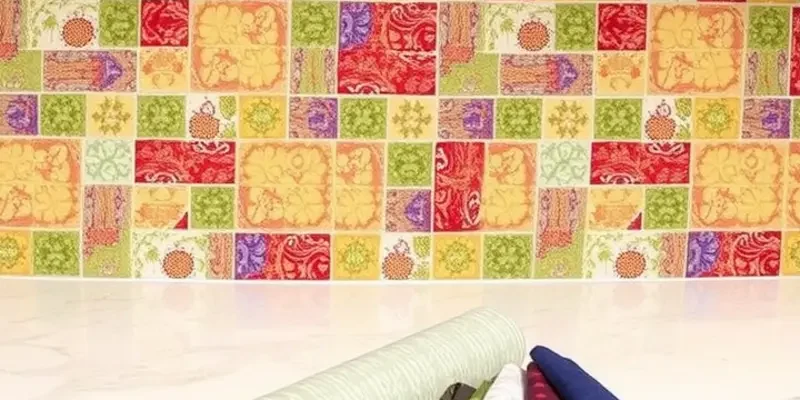
Creating a removable kitchen backsplash allows renters to personalize their kitchens without risking permanent changes or lease violations. With a plethora of materials and designs available, you can easily achieve a look that complements your style. Here, we’ll explore some popular options, including peel-and-stick tiles, removable wallpaper, and fabric.
Peel-and-Stick Tiles
Peel-and-stick tiles offer the look of traditional tiles without the fuss of mortar or grout. These tiles are pre-glued, making installation a breeze. They come in an array of designs, from classic subway tiles to ornate mosaics. Their versatility means they’re suitable for both contemporary and traditional kitchens. Simply cut to size, peel off the backing, and adhere to your chosen wall space.
Maintenance is minimal—clean the surface with a damp cloth. For renters, their real charm lies in their non-permanent nature. If you’re moving or updating your decor, peel-and-stick tiles can be removed without residue. This makes them an excellent choice for those looking to make stylish, temporary updates.
Removable Wallpaper
Removable wallpaper is a game-changer for renters. Available in stunning prints and textures, it can imitate anything from brick walls to intricate patterns. Its application is similar to that of peel-and-stick tiles. With its multitude of designs, this wallpaper can serve as a splash of modern art or a backdrop for a vintage theme.
To maintain its pristine condition, ensure your backsplash area isn’t directly exposed to heavy moisture. Use wallpaper specifically designed for bathrooms and kitchens, as it’s generally more moisture-resistant.
Fabric with Liquid Starch
For a truly unique backsplash that doubles as a conversation piece, consider using fabric. Choose a pattern or color that resonates with your decor style. To apply, coat the wall with liquid starch, smooth the fabric over the wet starch, and apply another layer of starch on top. This method allows you to easily peel off the fabric when your lease ends, with no damage left behind.
The texture of fabric offers warmth, making it a perfect match for cozy, rustic kitchens. Be mindful of the fabric choice to ensure it’s washable and durable, especially around areas prone to splashes.
Mixing and Matching Styles
Don’t feel confined to a single material. Mixing different types such as tiles with wallpaper can yield a stunning effect. Achieve a dynamic style by, for instance, creating a central tiled mural flanked by complementary wallpaper.
For further household project inspiration, especially if you’re looking to incorporate smart organizational solutions alongside your backsplash, you might find useful tips in apartment organization with baskets.
Regardless of your chosen materials, the key is to select options that enhance your kitchen’s aesthetics while ensuring ease of removal. With creativity and the right materials, your dream backsplash can refresh your kitchen, making it truly feel like home.
Step-by-Step Guide to Installing Your Backsplash
Transforming your rental kitchen with a DIY removable backsplash starts with careful planning and execution. Here’s a structured guide to help you achieve a professional look with ease and ensure hassle-free removal later.
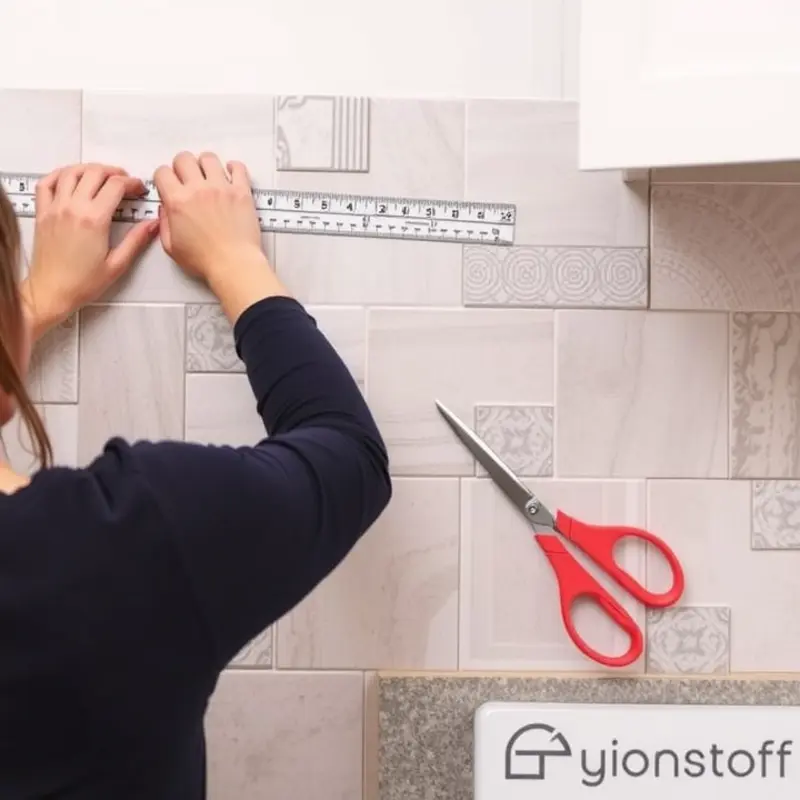
Start by taking accurate measurements. Measure the length and height of the area where you intend to install the backsplash. Add an extra 10% to your calculations to account for wastage and cutting errors. Ensure all measurements are precise as this will guide your material purchase and cutting processes.
Next, prepare your workspace. Clear your countertops, remove any decorative items, and clean the wall surface with a gentle cleanser to remove dirt and grease. A clean surface prevents adhesion issues and ensures a smooth finish.
Before cutting your backsplash material, lay it out across the countertop. This will help you visualize the placement and alignment, ensuring the pattern flows seamlessly once installed.
For installation, start at the center of your workspace and work towards the edges. This approach helps create symmetry, especially if the backsplash has a prominent pattern or design. Use a removable adhesive to affix the backsplash, pressing firmly to eliminate air pockets and ensure proper adhesion. Read the manufacturer’s instructions for the adhesive’s specific drying and curing times.
Pay attention to outlets and switches by carefully measuring and cutting necessary openings in your backsplash material. A Dremel tool or utility knife works well for precise cuts, helping maintain a professional look.
End the process by inspecting the edges. Trim any excess material using a craft knife, being cautious not to damage the surrounding surfaces. Obtain a clean finish by running a smoothing tool or a firm card along the edges.
For easy removal, start by gently prying a corner with a putty knife or plastic scraper. Work slowly along the edges to avoid damaging the wall. If adhesive remains, a mixture of warm water and gentle cleaner applied with a non-abrasive sponge should do the trick.
Maintaining your backsplash is effortless—wipe down periodically with a damp cloth to uphold its look. With a few simple tips, you’re on your way to a spectacular kitchen ambiance, all without permanent alterations or costly renovations.
For more inspiration on temporary home upgrades, check out our ideas for DIY apartment window seats.
Final words
A removable kitchen backsplash is a fantastic way to express your personal style and make a rental feel like home. Whether you choose eye-catching tiles, playful wallpaper, or elegant fabric, the possibilities for design are virtually limitless. Best of all, when you’re ready to move on, you can simply peel it off and take it with you, leaving the walls just as you found them. No need for costly renovations or permanent changes—just creativity and a little effort. So gather your materials, unleash your creativity, and start your DIY journey towards a kitchen that reflects who you are!