
For many renters, making a space truly feel like home can be a challenge, especially with limitations on permanent changes. If you’re a creative renter, young professional, student, or family looking to inject some personality into your living area, removable countertop solutions offer the perfect opportunity to customize without the commitment. These DIY projects not only provide a way to enhance the aesthetic of your kitchen or workspace but also serve as fun, engaging activities to undertake alone or with loved ones. From peel-and-stick decals to modular countertop replacements, there are myriad ways to elevate your surfaces. Let’s explore some inspiring methods that allow you to make a statement and take pride in your environment while keeping your landlord happy.
Charming Peel-and-Stick Countertop Decals
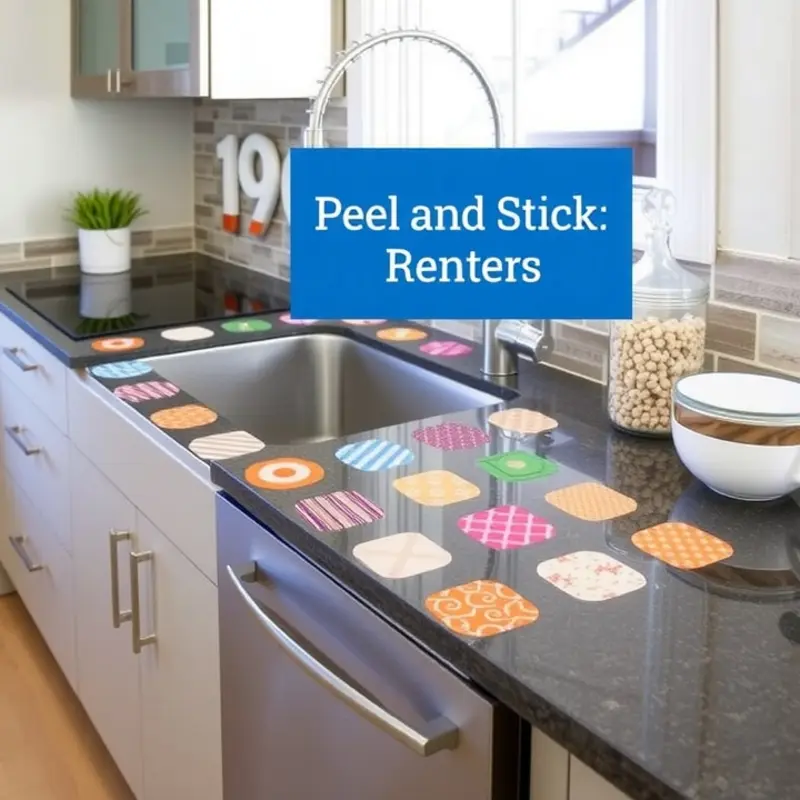
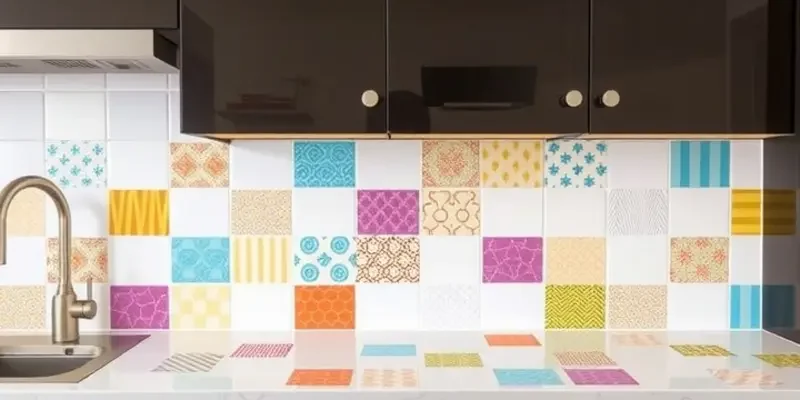
Transforming your countertops with peel-and-stick decals offers a stylish and temporary solution. These decals come in various designs, empowering you to personalize your space easily.
Begin by exploring different design ideas. From marble and granite patterns to artistic mosaics and modern graphics, the choices are abundant. Selecting a design is the first step in refreshing your kitchen or workspace. Consider your existing decor and aim for a decal that complements it. This ensures a cohesive and balanced aesthetic.
Before applying decals, accurate measurement is crucial. Use a measuring tape to determine your countertop’s dimensions. Measure both the length and width, noting any corners or edges that require special attention. Once measured, transfer these dimensions to your decals, marking them lightly with a pencil.
Cutting the decal precisely ensures a seamless fit. Use a sharp utility knife or scissors for clean edges. Cut slowly and carefully, following your measurements. If your countertop has grooves, cuts around sinks, or other unique features, take your time to craft the decal appropriately.
Application is where the transformation truly begins. Start by cleaning your countertop surface thoroughly. Remove dust, grime, and grease to allow the decal to adhere properly. Once clean, peel a small portion of the decal’s backing and align it with one corner of the countertop.
Slowly apply the decal, peeling the backing as you go. Use a smoothing tool or a credit card to remove air bubbles, working from the inside out. This technique promotes a smooth and professional finish. If misalignment occurs, gently peel back and reposition as needed.
Incorporating accessories can further enhance your newly decorated space. Use coordinated items such as utensil holders, cutting boards, and small potted plants. These elements tie the room together, highlighting your stylish update.
For those interested in more organization ideas that match their new countertop appearance, consider integrating basket organizers into your design. These can keep items accessible while maintaining a tidy aesthetic.
By following these steps, you can achieve a flawless and personalized countertop transformation. Remember, the key to success is careful preparation and attention to detail, ensuring each element blends seamlessly with your space.
Modular Countertop Solutions for Versatile Spaces
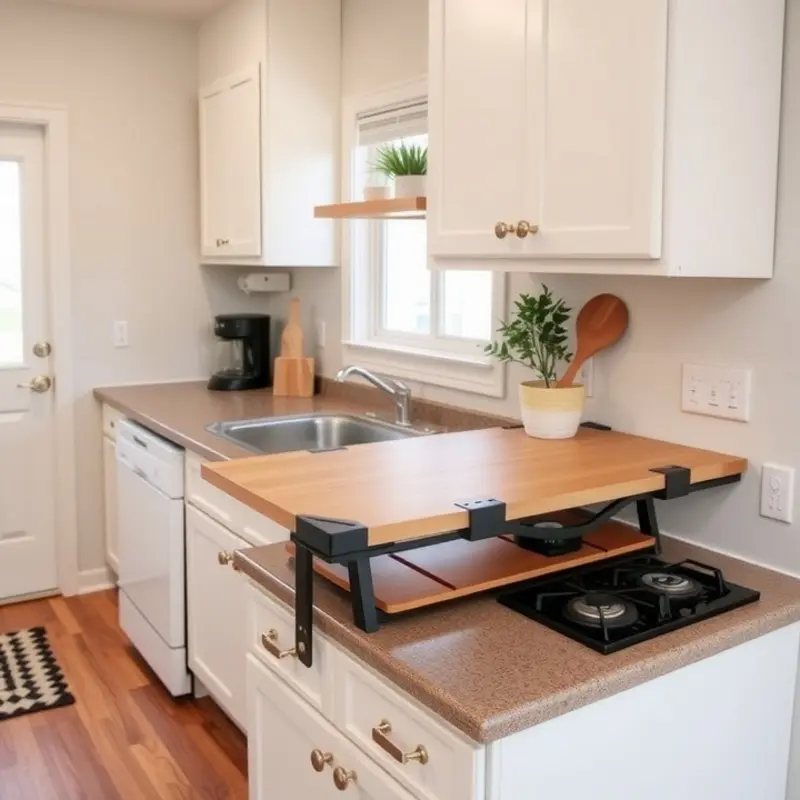
Creating a personalized and functional kitchen or workspace is attainable with modular countertops. These interchangeable pieces offer renters the flexibility to modify their space without permanent alterations.
Materials Selection
Choosing the right material can set the tone for your decor. Removable wooden countertops provide a warm, classic look, while acrylic offers a modern, sleek finish. For a more industrial aesthetic, consider stainless steel. The choice of material should reflect your style and practical needs, such as durability and ease of maintenance.
Tools Required
Assembling modular countertops requires basic tools. Ensure you have a measuring tape, saw (if cutting to fit), screwdriver, and sandpaper. Depending on your chosen material, you might need different saw blades. Safety gear, such as gloves and protective eyewear, are essential when handling tools and materials.
Step-by-Step Installation
- Measure and Plan: Accurately measure your existing countertop area to ensure the modular pieces fit seamlessly. Sketch a layout plan, accounting for sinks, stoves, and other immovable parts.
- Cut the Pieces: If custom sizes are needed, carefully cut the material using the appropriate saw. Sand the edges smoothly to avoid splinters or sharp edges.
- Secure the Countertop: Use brackets or adhesive strips designed for temporary fixtures to attach the modular pieces to your current countertops. This ensures stability without damaging the underlying surface.
- Seal and Finish: Apply a finish that suits your aesthetic. For wooden surfaces, varnish or oil can enhance grain patterns, while colored sealants can personalize acrylic or metal pieces. Allow sufficient drying time to prevent surface damage.
Customization Tips
- Wood Stains: Experiment with different wood stains to match existing furniture or create a contrast for visual interest.
- Paint Effects: For a playful approach, consider painting sections in bold colors or patterns. Use tape for clean lines, and opt for paint types suitable for the material you are using.
- Accessory Integration: Install modular inserts like cutting boards or removable trivets to enhance functionality. These elements can be swapped out or rearranged, offering endless customization.
Modular countertops not only add aesthetic value but also maximize utility in dynamic spaces. This approach allows renters and families to adapt their environments to changing needs easily. By investing time into thoughtful design and execution, you can create a kitchen that feels personal and is practical.
For more ideas on enhancing your living space, check out these apartment organization tips.
Final words
Creating a rental space that reflects your personality doesn’t have to be complicated or expensive. With clever DIY removable countertop solutions like peel-and-stick decals or modular pieces, you can transform your environment effortlessly. Not only do these options provide a fresh look, but they also respect the constraints of temporary living. So grab your tools, unleash your creativity, and begin your journey towards a home that feels uniquely yours. You’ll be amazed at how small changes can make a big impact.


