Renting shouldn’t mean sacrificing style. Many renters, whether you’re a student, young professional, or part of a family, face the challenge of personalizing their spaces without making permanent alterations. Enter DIY removable furniture wraps! These versatile and budget-friendly solutions allow you to infuse your personality into your home without worrying about your landlord’s rules. From vibrant colors to unique designs, furniture wraps can seamlessly transform your rental into a reflection of your style. With simple, step-by-step instructions, and a dash of creativity, you’ll find it easy to breathe new life into old furniture or even temporarily cover unsightly pieces that may not fit your aesthetic. Let’s explore how you can create a stylish, inviting living space that feels uniquely yours while keeping it rental-friendly.
The Essentials: Materials and Tools Needed
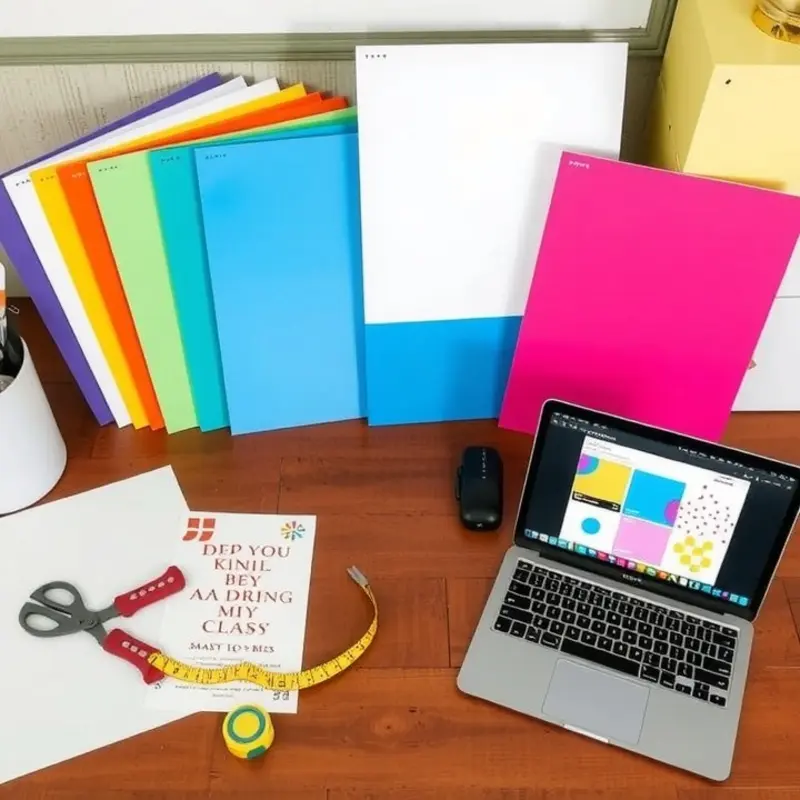
Gathering Materials and Wrap Options
For a successful DIY furniture wrap project, start by selecting materials that align with your aesthetic preferences and functional needs. Consider using peel-and-stick vinyl wraps for a modern and sleek finish. These wraps offer a range of designs, from minimalist patterns to bold, colorful graphics. If your style leans towards a warmer, textured feel, fabric wraps are an excellent alternative. They can add a cozy dimension to any piece of furniture.
When choosing vinyl or fabric, focus on durability, ease of application, and removability. Look for wraps specifically labeled as removable or renter-friendly to ensure they don’t damage underlying surfaces when removed.
Adhesives and Installation Tools
If opting for traditional fabrics that aren’t pre-backed with adhesive, select a fabric glue designed for easy removal. Ensure it’s clear-drying and non-permanent to prevent residue on your furniture.
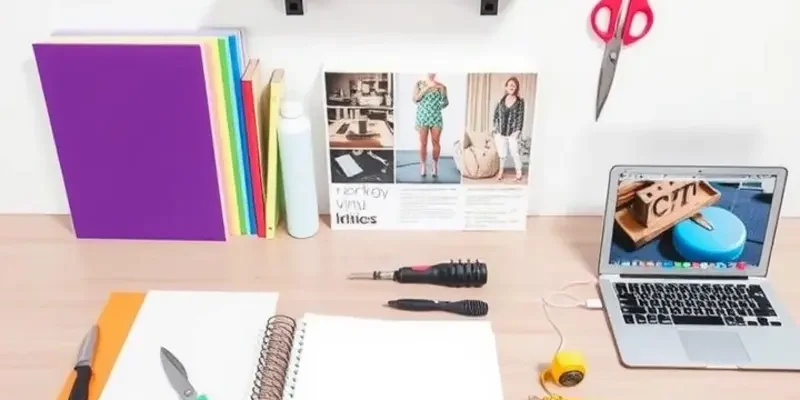
Essential tools for this project include a pair of sharp scissors for cutting materials to the desired size and a utility knife for precision trimming around edges and corners. A measuring tape is crucial for accurate sizing of wraps to fit perfectly on your furniture.
You’ll also need a squeegee or a similar tool to smooth out any air bubbles during application. This helps achieve a seamless, professional finish. If fabric wraps are your choice, a staple gun might be necessary, particularly for securing the fabric underneath surfaces like chair seats.
Cost-Effective Material Sourcing Tips
Decorating on a budget doesn’t mean compromising on style. Explore local craft stores for discounted remnants in the fabric sections. Remnants are often sold at lower prices, allowing for creative customization without breaking the bank.
Online marketplaces and community resale platforms can also be treasure troves for affordable materials, including vinyl wraps. It’s worth looking for sellers offering partial rolls or end-of-line patterns at reduced rates.
For adhesive needs, buy in bulk or look for coupons online to cut costs further. A little research and flexibility can significantly enhance your savings.
Further Reading and Resources
For additional inspiration on organizing and customizing your rental, check out ideas on using apartment organization baskets. These can complement your furniture wrap projects by providing practical and stylish storage solutions.
With the right materials and tools, you’re well-prepared to embark on your DIY journey. Transform your rental space without the fear of permanent changes, and let your creativity shine.
Step-by-Step Guide to Wrapping Furniture
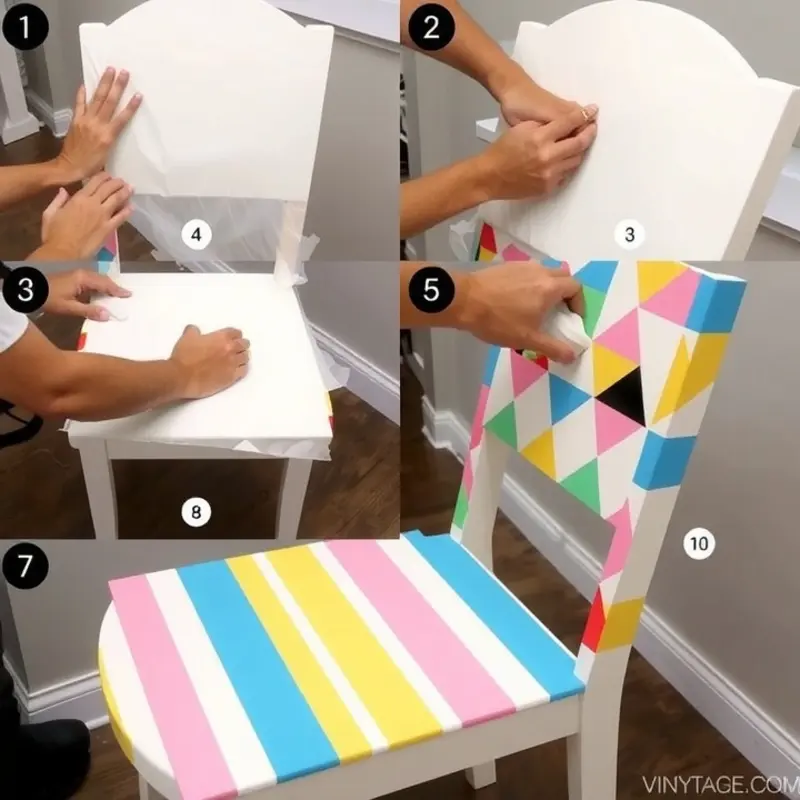
Now that you have everything ready, it’s time to bring your creative vision to life! Begin by gathering your tools: a tape measure, a utility knife, a squeegee, and the rolls of furniture wraps you’ve selected. Having these on hand will ensure a seamless process.
Start with precise measurements. Measure every surface you intend to cover, noting dimensions carefully. This ensures you cut your wraps accurately, minimizing waste and achieving a polished finish. For complex items like chairs with curves or decorative features, make templates using paper to guide your cuts.
With measurements in hand, proceed to cut the wraps. Place the wrap on a flat, clean surface, and use a ruler or straight edge to maintain accuracy while cutting. If you’re working with patterns, align them strategically to ensure they flow correctly across surfaces.
When applying the wraps, begin at one edge and work your way across the surface. Peel back the adhesive backing gradually, smoothing the wrap with a squeegee as you go. This helps to eliminate bubbles and creases. For textured surfaces, warm the wrap slightly with a hairdryer to make it more pliable, allowing it to adhere smoothly.
Corners and edges require extra attention. Cut small triangles from excess material at the corners to wrap them smoothly without bulk. Patience is key here; take your time to achieve a neat finish.
For design ideas, consider mixing patterns and solid colors for an eclectic yet cohesive look. Stripes on a desk paired with a solid color drawer can add visual interest. Floral patterns work well on tables, contrasting beautifully with plain chairs.
As your lease comes to an end, removing the wraps is simple. Carefully peel back the wrap, starting at one corner and moving slowly to avoid damaging the furniture surface. Any adhesive residue left behind can be gently cleaned with mild soapy water.
For renters interested in DIY renter-safe coat hooks, consider pairing matching wraps on coat hooks and surrounding furniture for a coordinated look.
By following these steps, you’ll transform ordinary rentals into personalized, stylish spaces without permanent alterations. This method not only safeguards your deposit but also makes your home truly feel like yours throughout your stay.
Final words
Personalizing your rental space doesn’t have to be a daunting or costly task. With DIY removable furniture wraps, you can easily express your style and create a home that feels uniquely yours without risking your security deposit. Whether you choose bold patterns or soft colors, each wrap can be a reflection of your personality. Plus, it’s an exciting way to involve family, friends, or even your children in decorating! Remember, the key is to have fun and experiment with designs that make you smile. So roll up your sleeves, get creative, and make your rental feel like home!