
Renting doesn’t mean you can’t add a personal touch to your living space. One of the easiest ways to inject flair and creativity into your rental home is by using DIY cabinet liners. Whether you’re a creative renter looking to express your style, a young professional who values a functional yet chic kitchen, a student making the most of limited space, or a family aiming for a cozy atmosphere, custom cabinet liners offer an affordable solution. With a few simple materials and a little creativity, you can transform the inside of your cabinets and drawers into something that reflects who you are. In this guide, we will walk you through fun and imaginative ways to make and apply cabinet liners that enhance the aesthetic of your rental without risking your security deposit. Get ready to dive into a world of vibrant patterns, textures, and functionality while keeping your interiors tidy and uniquely yours.
Choosing the Right Materials for Your Cabinet Liners

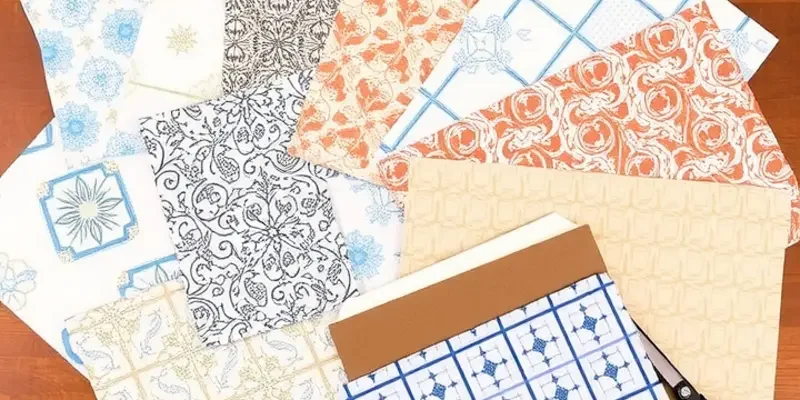
Selecting the perfect material for cabinet liners is crucial to ensure they not only protect your cabinets but also add a personal touch to your space. With choices ranging from peel-and-stick options to fabric liners, finding the right material can be both exciting and affordable, even for renters on a budget.
Peel-and-stick vinyl liners are popular due to their convenience and variety. They are easy to clean, available in numerous designs, and can be effortlessly removed without leaving residue. Simply peel them off whenever you want a change in decor. These liners are water-resistant, making them ideal for areas exposed to moisture like under the sink.
For a softer touch, consider fabric liners. These can be tailored to fit your shelves perfectly and are an excellent way to introduce patterns or colors that resonate with your aesthetic. They also offer the additional advantage of cushioning fragile items. Use a double-sided tape underneath to keep them in place without harming the cabinet surface.
If you’re looking for eco-friendly options, cork liners are a fantastic choice. Besides being sustainable, cork provides a non-slip surface, which helps keep items in place. It’s also naturally antimicrobial, providing a hygienic solution for kitchen storage.
Measuring and cutting your chosen liner material accurately is essential for a clean finish. Use a measuring tape to determine the size of each shelf or drawer. Add an extra inch to your measurements to compensate for any slight miscalculations. Cut the liner material using sharp scissors or a craft knife for precision. For intricate designs, a template can help ensure each liner is consistent and correctly fitted.
Enhance the design of your liners with stenciling or painting on fabric or plain vinyl. This personalization makes each piece unique and reflects your style, turning a simple liner into an artistic statement. Mix and match patterns, but keep the overall theme cohesive with your kitchen decor.
When curating your design, consider how each material will complement the existing elements in your kitchen. Neutral tones can harmonize with various styles, while bolder colors or patterns create a focal point in otherwise minimal spaces. For more inspiration on integrating functional decor into your rental space, check out this guide on DIY rental utility storage.
Always keep your rental agreement in mind, ensuring your choices align with any restrictions. Opt for non-permanent solutions that are easily reversible, allowing you to maintain both your deposit and your personal style. By selecting the right materials and creative ideas, charming cabinet liners can transform your kitchen without compromising your lease terms.
Step-by-Step Guide to Applying Your Cabinet Liners
Transforming your rental kitchen or bathroom with cabinet liners is a simple yet effective way to add a personal touch without risking your security deposit. This guide will walk you through the entire process, ensuring your liners fit snugly and look polished.
Preparation
Before anything else, it’s crucial to prepare the surface you’re working with. Begin by emptying the cabinet, drawer, or shelf where the liner will be applied. Use a mild cleaning solution to wipe away any dust or debris, followed by a dry cloth to ensure the surface is completely dry. A clean surface ensures that the liner adheres properly and lasts longer.
Measuring and Cutting
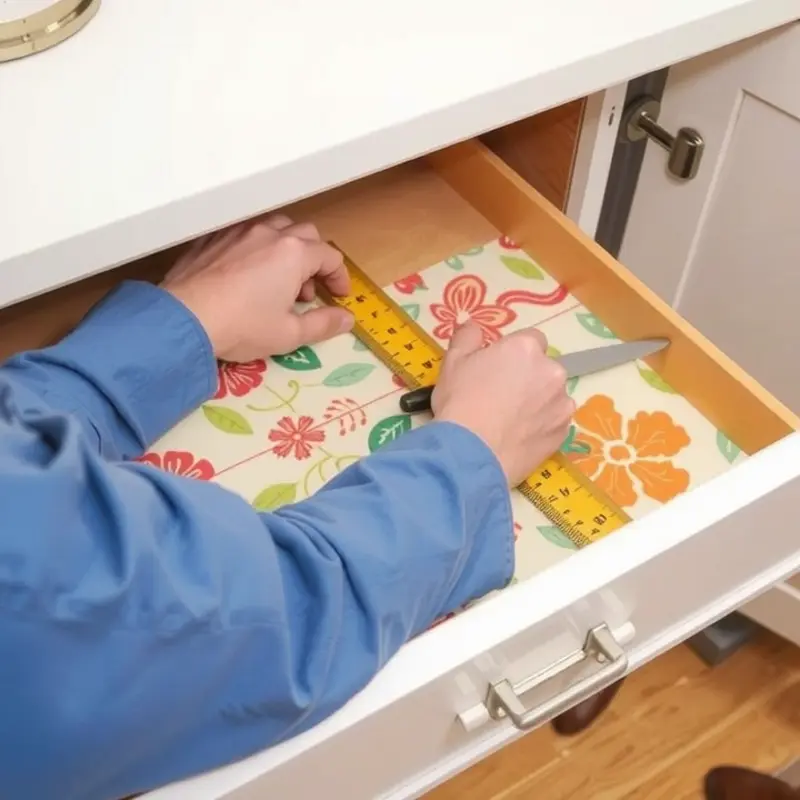
Next, measure the dimensions of the space where you plan to apply the liner. Accurate measurements are key to achieving a perfect fit. Use a flexible measuring tape to get the length and width, and don’t forget to account for any corners or angles.
Roll out your chosen liner on a flat surface. Using a pencil and ruler, mark the measured dimensions onto the back of the liner. Make sure to include an extra inch on all sides to allow for adjustments. A utility knife or sharp scissors will give you the best cut. Be sure to cut slowly for smooth edges, as rough or jagged edges may compromise the liner’s appearance.
Fitting and Applying
Begin by placing the liner inside the cabinet to check the fit. Adjust as necessary by trimming any excess material. Start applying the liner from one edge, smoothing it out as you go to avoid bubbles. For adhesive liners, peel back a small portion of the backing paper, pressing the liner down as you go. For non-adhesive liners, ensuring a snug fit will help keep them in place.
As you progress, use a straightedge or a plastic card to smooth out the liner, working from the center to the edges to eliminate air bubbles. If a bubble persists, gently lift the liner and reapply, continuing to smooth it out.
Finishing Touches
Once applied, reexamine for any edges that might need trimming. If the liner edges start to lift, consider using a small strip of double-sided tape to secure them. For open shelves or visible edges, be mindful of alignment for a seamless look.
By properly preparing, measuring, cutting, and applying, you’ll achieve a polished look that feels like home. For additional storage ideas, you may find inspiration in our DIY renter-safe storage baskets article, which pairs nicely with organized cabinet spaces.
This simple DIY project not only personalizes your rental but also offers a subtle way to protect the surfaces and potentially reduce wear and tear. Happy decorating!
Final words
Creating your own unique cabinet liners is a fantastic way to personalize your rental space and make it feel more like home. From selecting the right materials to applying them with finesse, these DIY liners can bring a delightful splash of color and style to any cabinet or drawer. As a renter, it’s both empowering and practical to invest a little time in aesthetics that positively impact your living environment without compromising your deposit. So, grab your materials, unleash your creativity, and enjoy the process of making your rental truly yours. Remember, it’s not just about the functionality; it’s about curating a home that reflects your personality and style!


