Creating a unique living space in a rental encompasses finding ways to add personal touches without risking your security deposit. One versatile and functional way to express your creativity is through makeup mirrors. With the right tools and simple designs, you can craft renter-safe mirrors that not only enhance your decor but also reflect your personal style. Whether you’re a student, a young professional, a creative renter, or a family, these DIY projects can be affordable, easy to execute, and a fun way to elevate any room. From minimalist designs to vibrant, colorful arrangements, you’ll discover step-by-step instructions to create mirrors that suit your taste. Dive into this exciting DIY adventure and give your rental a refreshing touch!
Framed Elegance: Building a Beautiful Mirror with Upcycled Frames
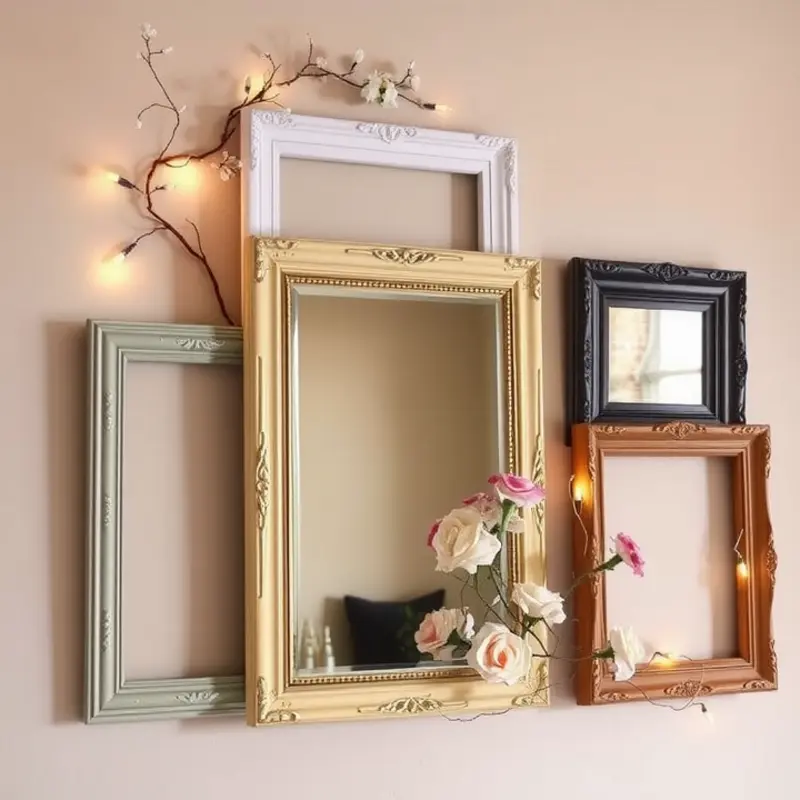
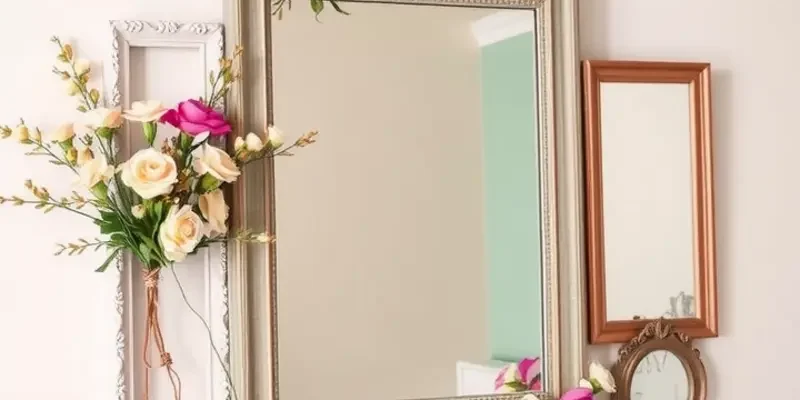
Transforming an array of old frames into a stunning makeup mirror isn’t just a creative endeavor—it’s a rewarding project that marries sustainability with style. Begin by visiting thrift stores, flea markets, or your storage closet to gather a unique collection of frames suitable for repurposing. The choice of frames can define the final aesthetic of your mirror, whether you opt for a harmonious look with similar styles or embrace eclectic charm by combining various shapes, sizes, and designs.
Start by cleaning the frames to remove dust or grime, revealing their hidden potential. Use sandpaper to smooth any rough edges if necessary, and wipe them down with a damp cloth. Once clean, arrange the frames on a large sheet of paper or directly on the floor to visualize your design. This allows you to experiment with different configurations until you find a layout that satisfies your artistic vision.
Next, consider a color palette that complements your space. Whether you paint all frames a uniform color or introduce a playful burst of hues, choose paint finishes like matte, glossy, or metallic based on your preference. Painting the frames is an opportunity to unify disparate frames into a coherent piece of art. Use a brush or spray paint for even coverage, and let them dry completely.
While the frames dry, prepare the backing for your mirror. A lightweight, sturdy backing board such as plywood or MDF is ideal. Ensure the board is slightly larger than the assembled frames to allow for easy hanging and a neat appearance. Covering the board with adhesive, carefully attach the frames, pressing them firmly to ensure they adhere well.
Once the frames are mounted, cut mirrored glass to fit the open sections of your frames. Most glass shops offer custom-cut mirrors to match your specifications. Secure the mirrors to the frame’s backing using clips or strong adhesive, ensuring they are aligned and secured.
Now, assess the hanging mechanism. An apartment-friendly solution is using anti-damage picture hanging strips or hooks, making it easy to hang without compromising wall integrity. This approach ensures your mirror can be moved or adjusted without leaving lasting marks, a concern for many renters.
By crafting your DIY renter-safe makeup mirror, you not only enhance your decor but also imbue your space with a personal touch that speaks to your unique style. This project showcases sustainability by repurposing materials and creatively uses apartment-friendly craft storage solutions, allowing for a seamless blend of beauty and functionality. Let your imagination and the tools at your disposal guide you in the creation of a reflective masterpiece that embraces the elegance even in the most humble frames.
Color Pop: Creating a Modern, Fun Mirror with Washi Tape
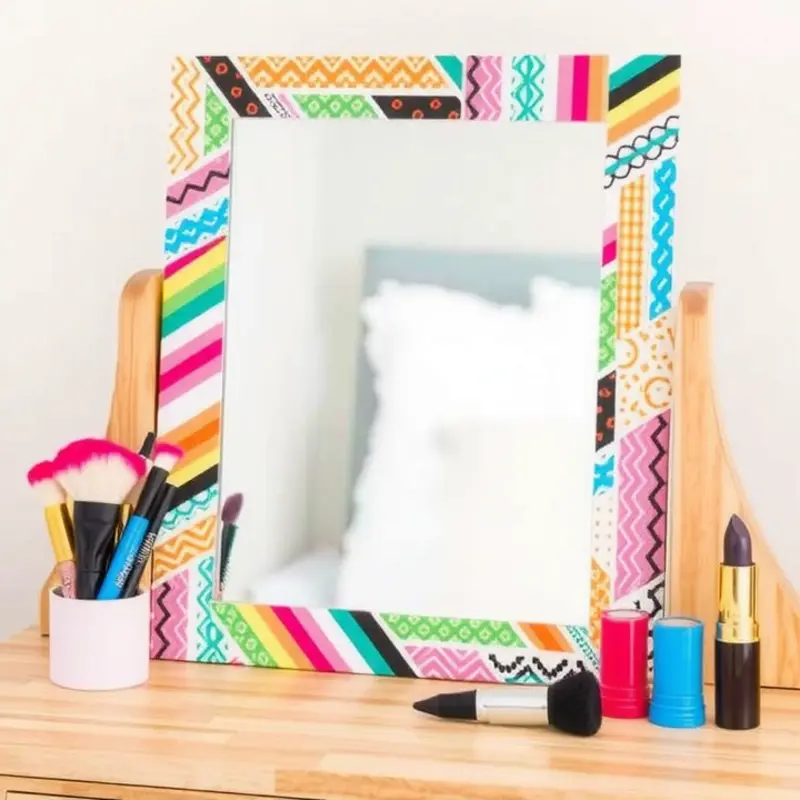
Transforming a plain mirror into a dazzling piece of art becomes easy with the vibrant power of washi tape. This inexpensive and renter-friendly project allows you to splash colors in your decor without any permanent changes. Let’s dive into crafting a modern, fun mirror that reflects your unique style.
Washi tape is a versatile tool, available in an array of colors, patterns, and widths. It can be applied smoothly and removed just as easily, making it the perfect craft material for renters. Here’s how to create a stunning framed mirror using washi tape:
Materials Needed:
- A plain mirror (any size you prefer)
- Assorted rolls of washi tape (choose colors and patterns that match your style)
- Measuring tape and pencil
- A pair of scissors or a craft knife
- Ruler or straight edge for precise lines
Step-by-Step Guide:
-
Choose Your Design:
Start by envisioning the design you want around your mirror. Geometric patterns, stripes, or a mix of lines and shapes can work brilliantly. A simple internet search may provide inspiration or patterns to replicate. -
Clean the Mirror Frame:
Ensure the frame of your mirror is clean and dust-free. This helps the washi tape stick better and longer. -
Measure and Mark:
Use the measuring tape and pencil to mark the areas you’ll cover with washi tape. This will guide your application and ensure a neat appearance. -
Apply the Tape:
Begin by affixing the washi tape along the lines you’ve marked. Depending on your design, start from one edge and work your way across. Make sure each strip is laid flat and completely adhered to the surface. -
Cut and Tuck:
Use scissors or a craft knife to trim any excess tape at the ends. Tuck the edges neatly under the mirror’s frame for a professional finish. -
Layer and Repeat:
For layered designs, like overlapping colors or creating a border, add more layers of tape. Gradually build up your pattern until satisfied. -
Secure (Optional):
To ensure the washi tape stays in place, especially in humid environments, consider applying a thin layer of removable adhesive spray or a light mist of water-resistant craft sealant.
Final Touch:
With your new custom piece, this vibrant mirror becomes a focal point in your room. Place it strategically within your living space to catch light and colors, adding openness and brightness.
For more decorating tips using less permanent solutions, consider checking out creative ideas for DIY wall pockets that pair well with artistic mirrors in creating an eye-catching and organized space.
Incorporating washi tape in your decor opens endless possibilities while keeping it renter-friendly. Experiment with colors, patterns, and shapes until you find the perfect spark for your personal sanctuary.
Final words
Creating your dream makeup mirrors is an enjoyable way to personalize your rental home. The projects not only allow you to express your creativity but also add functional beauty to your space. With simple materials and a sprinkle of imagination, you can effortlessly enhance your home environment while keeping it renter-friendly. From vintage styles to vibrant washi tape finishes, there’s no limit to what you can create. So gather your materials, invite your friends for a fun crafting session, and watch your vision come to life. Happy decorating!