
Living in a rental doesn’t have to mean sacrificing style or functionality in your kitchen. For creative renters, young professionals, students, and families, the desire to personalize and adapt your space can be fulfilled with affordable DIY solutions. Utensil storage can often be neglected, hiding your beautiful tools away in cluttered drawers. With these unique projects, you’ll not only organize your kitchen but also enhance its charm. In this guide, we explore two renter-safe, stylish DIY projects that will effortlessly blend functionality and flair. Whether you prefer a rustic charm or a modern minimalism, there’s a project for every taste. Let’s create a kitchen space that sparks joy and inspiration, proving that rental living can be both beautiful and practical.
Embrace the Pegboard: Stylish Hanging Storage
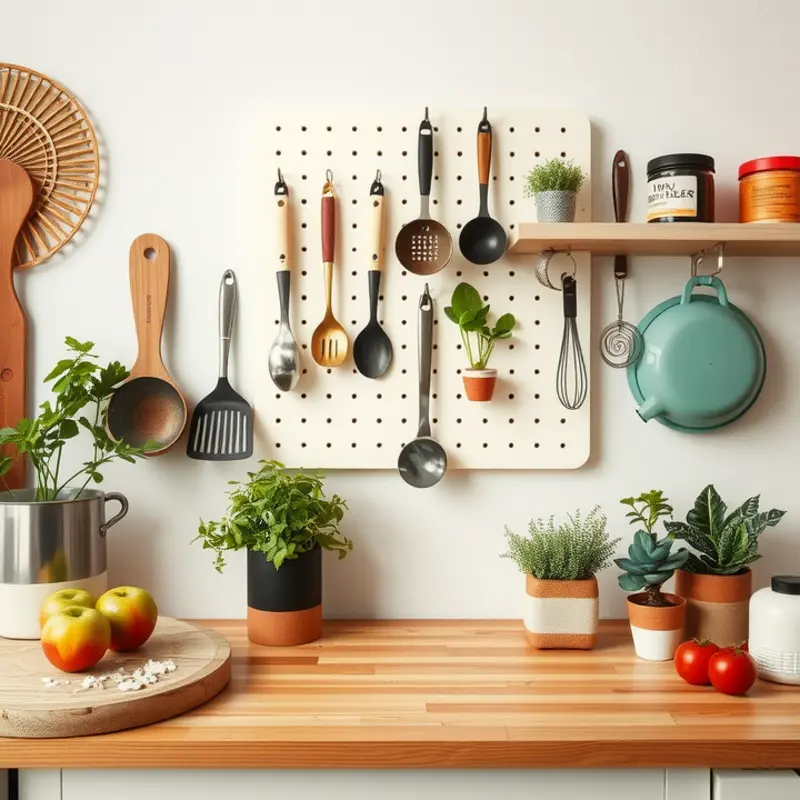
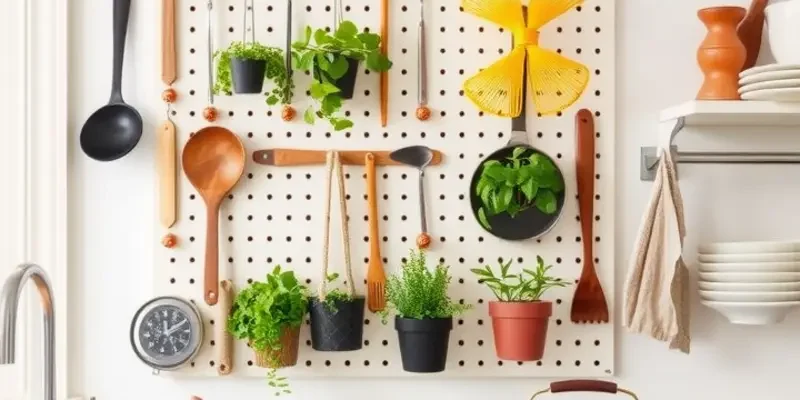
Transforming a blank kitchen wall into a functional and stylish space is simpler than you might think, thanks to pegboards. These versatile tools are perfect for renters looking to declutter countertops while adding a creative flair to their living space.
Start by choosing a pegboard material that suits your aesthetic and budget. Options range from classic perforated wood to more modern, chalkboard-esque finishes or even metal for an industrial look. Measure your available wall space carefully to ensure the pegboard fits perfectly without overwhelming the area.
Materials you’ll need:
- Pegboard (wood or metal)
- Wall anchors and screws
- Drill and level
- Assorted pegboard hooks and baskets
- Sandpaper (if your pegboard needs smoothening)
- Paint or wood stain (optional)
Installation Guidance:
Begin by smoothing any rough edges on your pegboard with sandpaper. If you choose to paint or stain the board to match your kitchen’s theme, ensure it dries fully before installation. Use a level to position the pegboard on your chosen wall. This step is crucial for both visual appeal and functionality.
Next, mark the drill holes on the wall through the pegboard’s existing holes—typically every six to twelve inches along the top and bottom. Ensure the anchors and screws are suitable for the wall type, especially if you’re drilling into drywall or tile. Use wall anchors if necessary to support the pegboard’s weight when laden with utensils.
Once your pegboard is mounted, it’s time to get creative! Pegboard hooks and baskets come in many shapes and sizes, offering a wide range of storage possibilities. Mix and match using single hooks for ladles and whisks, and small baskets for loose items like cookie cutters or tea infusers.
Styling Tips:
A pegboard can be as much about decor as it is about organization. Arrange utensils in a visually pleasing way, considering both color and shape. Group items by function or type for easier access and a cleaner look. For a pop of color, coordinate utensils with kitchen towels or add small planters for herbs, which can double as handy cooking essentials.
Consider adding labeled baskets for items used less frequently, allowing the pegboard to function as both art and accessible storage. This is particularly useful if counter space is cramped, as the pegboard keeps needed tools at arm’s reach without clutter.
If you find inspiration, animated displays can reflect the changing seasons or festivities by altering the functional decor—switching out spatulas in spring hues with those in warm, autumnal colors when the time comes.
Installation and styling of a pegboard offer endless options. It’s an excellent project for renters seeking to personalize and maximize their kitchen space without significant modifications. For more inspiring DIY storage ideas, check out this apartment-friendly DIY vanity guide. The creativity you exhibit with your pegboard can easily translate to other parts of your home.
Mason Jars and Vintage Vibes: Captivating Tabletop Storage
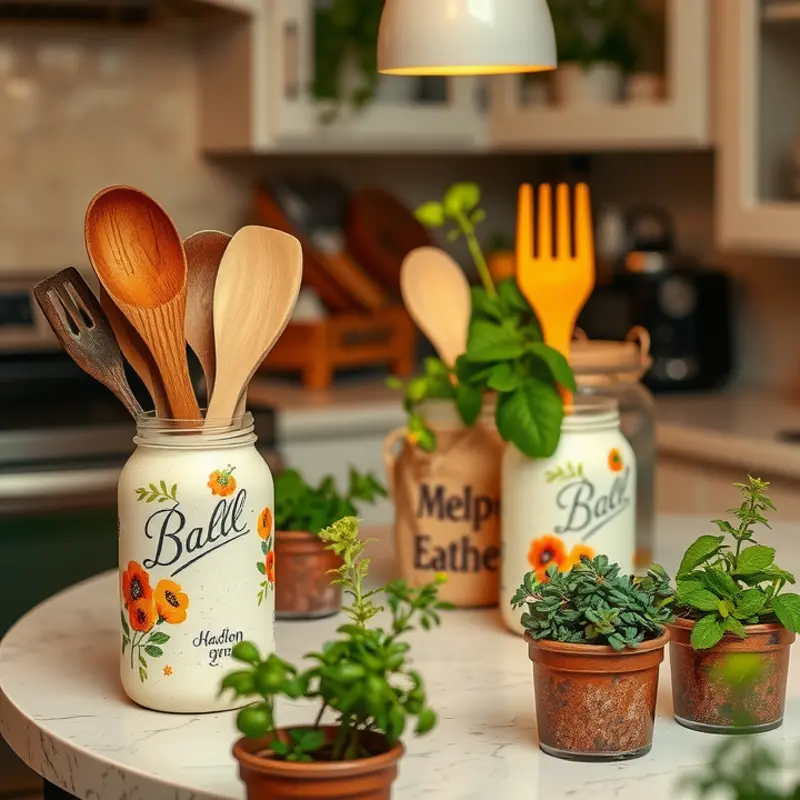
The unassuming mason jar, a staple in homes for decades, can breathe life into your kitchen with a blend of charm and practicality. Tap into their versatile nature to create an enchanting and functional utensil storage solution. This approach provides the perfect mix of vintage flair and modern efficiency, all while being incredibly easy to execute.
Gather Your Materials
Begin by collecting a variety of mason jars. Aim for different sizes to accommodate various utensils, such as forks, spoons, and ladles. Visit local thrift stores or craft markets for more unique pieces that can enhance the vintage look. Combine these with a few plain jars if needed, as uniformity isn’t necessary for a captivating display.
Preparation
Before decorating, ensure each jar is thoroughly cleaned and dried. Removing labels is essential—use warm soapy water and a scraper if necessary. For stubborn adhesives, a mixture of baking soda and oil can work wonders. Preparing your jars properly is crucial for any decorative elements to adhere well and for a polished end result.
Decorating the Jars
Let your creativity flow when it comes to decorating. Wrap the jars with burlap or lace for a rustic look. Alternatively, use twine to create delicate bows around the neck. Consider adding chalkboard labels for a touch of farmhouse charm, which also allows you to easily identify the jar’s contents. A quick spritz of paint can transform transparent jars into opaque, colorful additions to your countertops. Choose muted tones to keep with a vintage theme or go bold with bright hues to add a pop of color.
Arranging Your Display
Strategically arranging your jar collection on the countertop is key to maximizing both aesthetic appeal and accessibility. Place the largest jars at the back and smaller ones in front, creating a tiered effect. Group related utensils in adjacent jars: spoons with spoons, spatulas with spatulas. This layout not only adds to the visual appeal but also makes it practical to reach for the right tool without hassle. Position the jars near the stove or sink for ultimate convenience.
Adding Personal Touches
Enhance your setup by integrating natural elements. Fresh or faux flowers can adorn some jars to integrate the structure with a touch of gentleness. Incorporate small chalkboard signs for personalized messages or labels, adding further character to your arrangement. This is where the stored utensils meet personable art, making the functionality not just practical but pleasant.
Versatile Vintage Meets Modern Living
The appeal of mason jars lies in their ability to adapt to any stylistic preference while maintaining utility. They bridge the gap between decorative and useful, providing a renter-friendly storage solution that doesn’t compromise on style. For those interested in combining elegance with efficiency without altering permanent fixtures, mason jars are indeed a dream come true.
Transforming your kitchen into a bastion of both charm and functionality extends beyond traditional storage methods. Incorporate other DIY strategies to enhance your kitchen’s decor without much expense, like in apartment-friendly DIY vanity projects, blending simplicity with elegance across different home spaces.
Final words
With these renter-safe utensil storage solutions, you have the keys to transform your kitchen into a personalized haven of creativity and organization. The pegboard adds a modern edge while allowing you to display your favorite tools beautifully, and the mason jars embrace a charming vintage aesthetic that elevates counter space. These projects not only declutter but also invite a sense of joy and uniqueness into your home. Embrace your creativity, mix and match styles, and above all, enjoy the process of making your space distinctly yours. Remember, your rental is your canvas; let it reflect your personality!


