
Renting doesn’t mean sacrificing style or functionality. With DIY renter-safe wall hooks, you can add personality to your space without fear of losing your deposit. Perfect for young professionals, creative renters, students, and families, these wall hooks allow you to display your favorite items—whether it’s artwork, hats, or plants—while keeping your rental intact. Even better, these projects are affordable, easy to execute, and don’t require a master’s degree in craftsmanship. Gather your materials, unleash your creativity, and let’s make your rental feel like home. From modern styles to crafty looks, you’re bound to find a project that fits your aesthetic and practical needs. Get ready to dive into the world of DIY wall hooks!
Stylish Wooden Wall Hooks
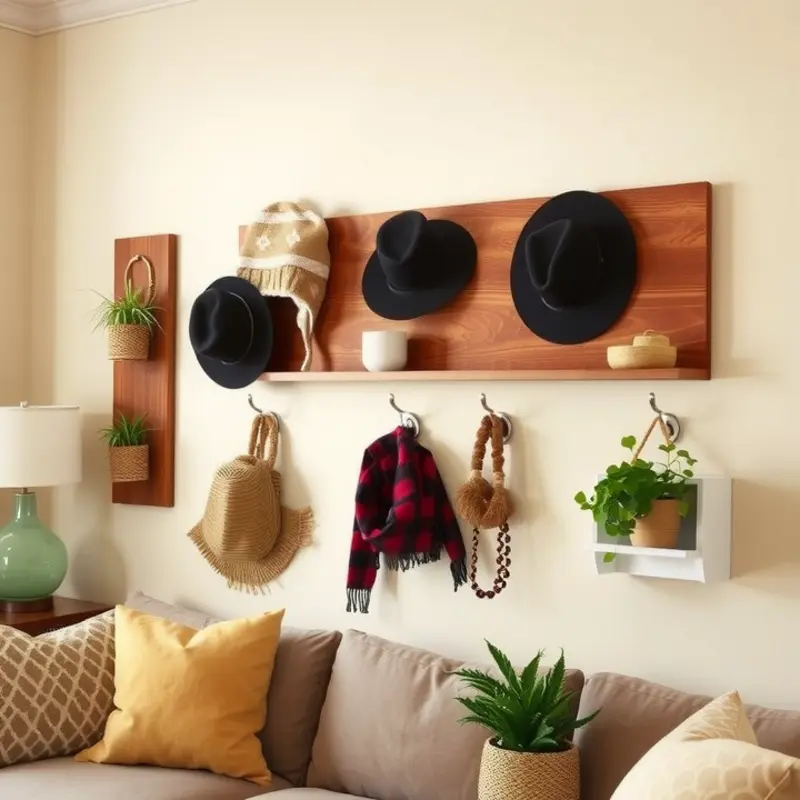
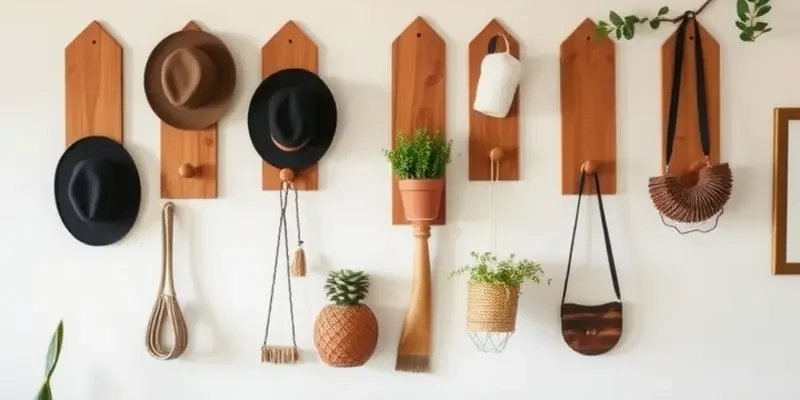
Creating wooden wall hooks not only enhances your space with rustic allure but also provides a functional touch that complements any modern decor. This guide will walk you through crafting these stylish hooks, which are easy to personalize and perfectly suited for the rented home.
Start by selecting the type of wood that resonates with your style and the existing elements in your apartment. Oak and walnut bring warmth and strength, while maple offers a light, clean aesthetic. Consider reclaimed wood for a sustainable choice that adds character with its history-rich imperfections.
Once you’ve selected your wood, it’s time to cut it to size. Measure and mark your desired dimensions—generally, a hook about 4 to 6 inches long and 2 inches wide is effective. Use a hand saw or miter box to cut the wood. If precision cutting isn’t your forte, many local workshops and DIY spaces provide the necessary tools and guidance.
Next, smooth out the edges with sandpaper. Start with a coarser grit, like 80, and gradually move to a finer grit, such as 220. This will ensure a smooth, splinter-free finish that is pleasant to touch and safe for clothing or accessories.
Attach the hardware using screws and suitable anchors if needed. A toggle bolt or molly bolt, for example, ensures that the hooks will carry weight without damaging the wall. Pre-drill the holes to prevent the wood from splitting and to guarantee a clean insertion of the screws.
Now, you can add a personal touch to your hooks with finishes and colors. Apply wood stain for a natural look, or paint them in a bold hue for a modern twist. For a cohesive appearance, match the color palette of your hooks with other elements in the room. You might choose to varnish the wood for durability and shine, preserving the tones while adding a protective layer.
Experiment with shapes and arrangements to truly make these hooks your own. Consider geometric designs or unique arrangements like a cluster or horizontal row to add visual interest. Remember to arrange them on the wall with balance in mind, complementing existing wall art or furniture for a harmonized aesthetic.
Personalized wooden hooks offer a tasteful blend of utility and style without permanent alterations to your rental home. They embody a marriage of rustic and contemporary charm, providing practical solutions for decluttering and organizing your space. For more tips about integrating personalized designs into rental spaces, explore our other renter-friendly bedroom storage ideas.
Now that you’re equipped with the know-how to create bespoke wall hooks, let your creativity lead you. These simple additions have the power to transform your temporary living space into a personalized retreat, all while keeping landlord agreements intact.
Creative Fabric-Covered Hooks
Personalizing your rental without permanent changes can be a delightful challenge. Fabric-covered hooks are a renter-friendly way to add color and texture to your space without compromising your lease agreement. Here, we present a step-by-step guide to transforming plain hooks into fabulous decorative features.
Begin by selecting vibrant or textured fabric that complements your existing decor. Consider colors that echo the hues in your living room or a playful pattern for a more eclectic look. If you’re unsure of where to start, think about the area where you’ll be placing the hooks. The fabric you choose should bring a little flair without overwhelming the design scheme.
Once you have your fabric, it’s time to prepare the material. Measure the size of your hook and cut your fabric into a rectangle or square, depending on the shape of the hook. A useful tip is to leave a half-inch allowance around the edges. This ensures enough material to wrap securely around the hook, providing a seamless finish.
With your fabric ready, it’s time to apply the adhesive. For best results, use a renter-friendly adhesive that provides strong adherence without damaging the hook’s surface or leaving a permanent residue. Lightly coat the hook with the adhesive, being careful to avoid thick, uneven layers.
Carefully wrap the fabric around the hook, pressing gently to secure it in place. Make sure to smooth out any bubbles or wrinkles as you go. Use your thumb and index finger for precision, and a small tool or a ruler for the tighter areas. For an added touch, use coordinating thin ribbons or small, lightweight embellishments to accent the fabric.
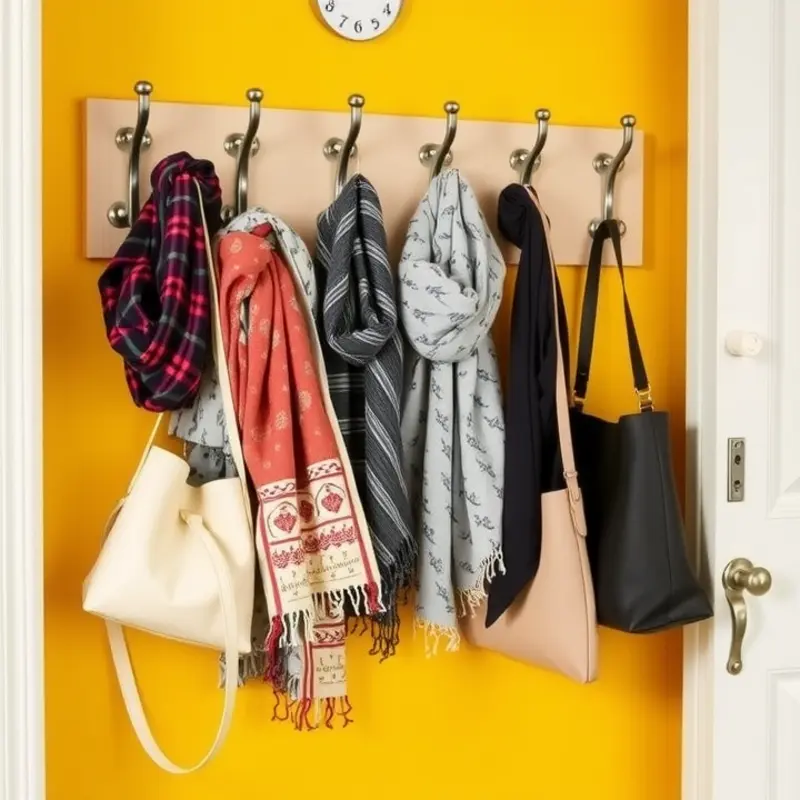
Once your fabric is secured, it’s time to install the hook. For rental spaces, damage-free hanging strips or removable wall adhesive solutions are ideal. These products support the weight of the hook and any lightweight item you choose to hang, such as keys, lightweight jewelry, or scarves. Attach the hanging mechanism to the back of the hook, ensuring it adheres properly.
When placing your hooks, consider the overall layout and accessibility. Hang them at eye level for convenience and ensure enough space between each to accommodate the items you plan to hang. This approach not only maintains a neat appearance but also makes your hooks functional and stylish.
Incorporating fabric-covered hooks into your rental is more than a simple DIY project; it’s a way to express your creativity with minimal impact on your living space. By following these steps, you can have beautifully personalized hooks that blend seamlessly with your decor while preserving the integrity of your walls.
For more renter-friendly storage solutions, consider exploring our guide on renter-friendly bedroom storage.
Final words
DIY renter-safe wall hooks not only beautify your space but also provide practical solutions to hang your beloved items without leaving a mark. By creating your own hooks, you can truly make your rental feel personal and inviting. Remember, each project can be as unique as you are—experiment with colors, shapes, and materials that suit your lifestyle and preferences. These hooks allow for flexibility and creativity, enabling you to adapt your space as your needs change. So gather your supplies, start crafting, and take pride in the fact that you’re not just making your home more functional, you’re making it uniquely yours.


