Renting doesn’t have to mean sacrificing style and organization. Creating a personalized space that meets your needs while reflecting your personality is entirely possible with some simple DIY wall organizers. Young professionals, creative renters, students, and families alike can benefit from adding functional art to their walls. Not only do wall organizers help keep everything from keys to school supplies within easy reach, but they also turn bland rental walls into vibrant, expressive canvases. With a bit of creativity and some easily sourced materials, you can create custom organizers that suit your style and space. Whether you’re looking to make the most of limited square footage or simply want to add a personal touch to your rental, this guide is packed with inspiring ideas and practical steps to get you started.
Functional Art: Creating a Pegboard Organizer
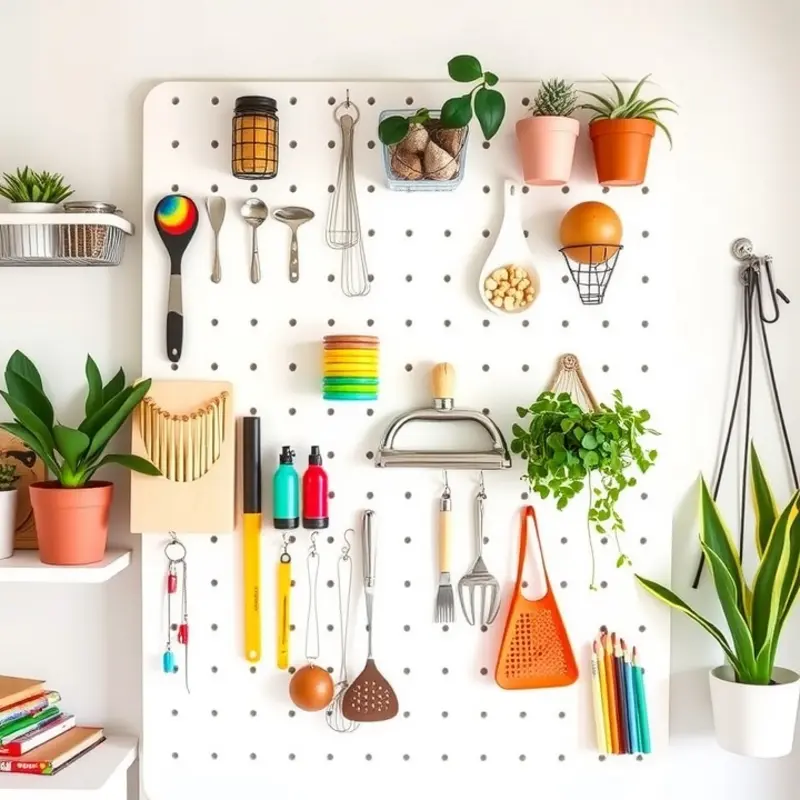
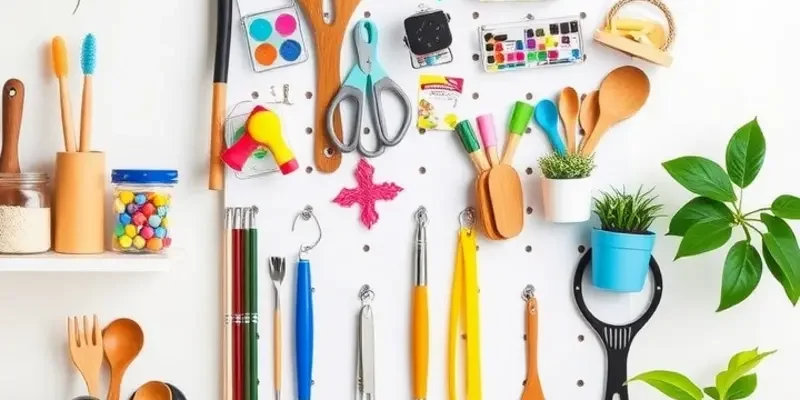
Transforming a simple pegboard into a stylish wall organizer is an excellent way to merge functionality with artistic expression. Pegboards are not just for garages or workshops; they can be a versatile choice for virtually any room in your rental home. Whether you’re aiming to display craft supplies in your studio or kitchen utensils within easy reach, the pegboard provides a customizable solution. Here’s how to set up and personalize one to enhance your living space.
Step 1: Choose Your Pegboard
Before diving into the project, decide on the size of your pegboard. Consider where you intend to hang it and what you plan to store or display. Larger pegboards work well in spaces like the kitchen or office, while smaller ones are perfect for entryways or bedrooms.
Step 2: Prepare Your Materials
You’ll need paint, brush or spray paint, mounting hardware, and various hooks or attachments. Choose colors that complement your existing decor or opt for a bold hue to create a statement piece. If your pegboard is made from wood, sand it lightly for a smooth painting surface.
Step 3: Painting the Pegboard
Once the pegboard is ready, apply a base coat of paint. A primer is recommended, especially for a durable finish. Let it dry before applying the topcoat in your chosen color. Don’t shy away from using techniques like color blocking or stenciling for added flair.
Step 4: Mounting the Pegboard
For a renter-friendly installation, explore command strips or adhesive hooks, which minimize wall damage. Make sure the pegboard is secure enough to hold the items you plan to organize. Position it at a height that’s easily accessible while allowing enough wall clearance. Learn more about apartment-friendly DIY projects.
Step 5: Customize and Organize
With the pegboard mounted, arrange your hooks and accessories. Use different types of pegs and baskets to house various items. For a kitchen setup, hang utensils, measuring cups, and mugs. In a home office, you might store scissors, tape, and washi tape dispensers for quick access.
Step 6: Revise and Refresh
The beauty of a pegboard is its flexibility. As your needs change, you can easily adjust the layout. Add extra elements or swap out seasonal decor to keep the design fresh. Don’t hesitate to repaint if you redecorate your room or simply want a new look.
This pegboard organizer serves as functional art, enhancing efficiency in your home while reflecting your personal style. Whether you’re working with a monochromatic palette or an explosion of color, the end result is a cohesive and tailored space.
Chic and Simple: Fabric Wall Pockets

Fabric wall pockets are an elegant and functional addition to any rental space, perfect for maximizing small areas without compromising style. These pockets offer you the flexibility to create customized storage solutions while adhering to rental restrictions that might otherwise limit your home organization options.
Choosing the Right Fabric
Begin by selecting fabrics that resonate with your personal style or match your existing decor. Consider materials that offer both visual appeal and durability. Cotton canvas is a popular choice due to its sturdiness and variety of patterns. Alternatively, opt for linen or denim if you’re aiming for a textured look. For more vibrant or thematic spaces, try bold prints or even recycled fabric to add an eco-friendly touch.
Sewing Techniques
If you’re handy with a needle and thread, sewing your own fabric pockets can be both rewarding and straightforward. Start by measuring the area where you want to hang your pockets, then cut your fabric into rectangles that fit this space, allowing extra fabric for seams. Sew the pieces together, leaving the top edge open. You can create multiple pockets by stitching vertical or horizontal seams across the large fabric piece, effectively dividing it into sections. Make sure to double stitch the bottom corners for added strength.
No-Sew Alternatives
For those who prefer a craftier approach without the sewing, fabric glue is your best friend. Cut your fabric into your desired size and shape, then fold the edges over and secure them with fabric glue. Let them dry completely before handling. You can use iron-on hem tape as another no-sew alternative to secure the edges. Attach these pockets to a hangable base, such as a wooden rod or a wire frame, and hang them on adhesive hooks to avoid damaging the walls—an ideal tactic for renters.
Custom Layouts and Uses
The versatility of fabric wall pockets allows various configurations to suit different needs. Layouts can be either uniform, with equally sized pockets, or eclectic, with varied sizes for a more dynamic appearance. Consider pockets large enough for books or magazines in a living room setting, or smaller ones for keys and mail near the entrance. In a child’s room, colorful pockets can keep toys and arts supplies organized and within reach.
Beyond filling a functional need, these wall pockets offer a canvas for expression, transforming a utilitarian object into an aesthetic statement. Each pocket arrangement presents new opportunities for flair, right on your rental’s walls.
For additional apartment organization tips, you might find inspiration in this apartment organization using baskets guide, which also supports renter-friendly decor ideas.
Final words
Personalizing your rental home with DIY wall organizers is not only a great way to maximize space and organization but also an opportunity to express your unique style. From pegboard systems to fabric wall pockets, these projects are approachable, affordable, and incredibly satisfying. Embrace your creativity and explore different materials and designs to create organizers that resonate with you. A well-organized space contributes to your well-being and can transform your everyday life, making your rental feel more like home. So gather your materials and start this fun and rewarding journey toward a more organized and beautiful living space.